


Process Zero is Halide’s own minimal, film-like process for taking shots with zero AI and minimal processing. You can get Halide with Process Zero here.
You might have some questions about it, so here’s some answers!
What is Process Zero?
Process Zero is our way of processing your image.

When you take a photo on an iPhone, your image is processed. Depending on how new your iPhone is, it will take anywhere from a few to many photos in a flash, and intelligently combine them. It will use AI to separate people or objects of interest and make them brighter, make the sky a bit more blue, and so on. It will also remove noise, sharpen the shot, adjust colors and more. All that is called 'image processing’, and it is what helps you get great shots out of your tiny iPhone camera.
iPhone camera processing can be fantastic, or it can be frustrating. You might have had a photo once that came out very differently than you saw it. You might simply have ‘edited’ the photo differently than what the process decided to do. Unfortunately, once processed, the changes can not be undone. Your photo is what it is.
Process Zero is a different process than the iPhone’s default processing option. It skips almost all of those steps. There’s no AI involved at all, and instead of taking a spread of photos and combining them, it only takes one. It makes for very different looking photos: they can be contrasty, dark, imperfect, a bit grainy (especially in low light) but unique and authentic.
Is it better than my iPhone’s default processing?
The best part of adding it, is that you get to decide that!
Some Process Zero photos
We added Process Zero so you have a choice. Where previously you basically always had to opt into a processed image with default camera image processing, you can now choose — even for every other shot you take — what process to use.
We recommend trying it out, and deciding for yourself. We are huge fans of Apple’s processing, and consider it the best in the business. We also sometimes prefer to have control over all the decisions when it comes to editing our photo.
How does Process Zero work, and how do I use it?
Process Zero works by taking a single photo — and collecting the raw sensor data. Halide gets to work right away to process the image very minimally: we make the shot more usable with slight enhancements.
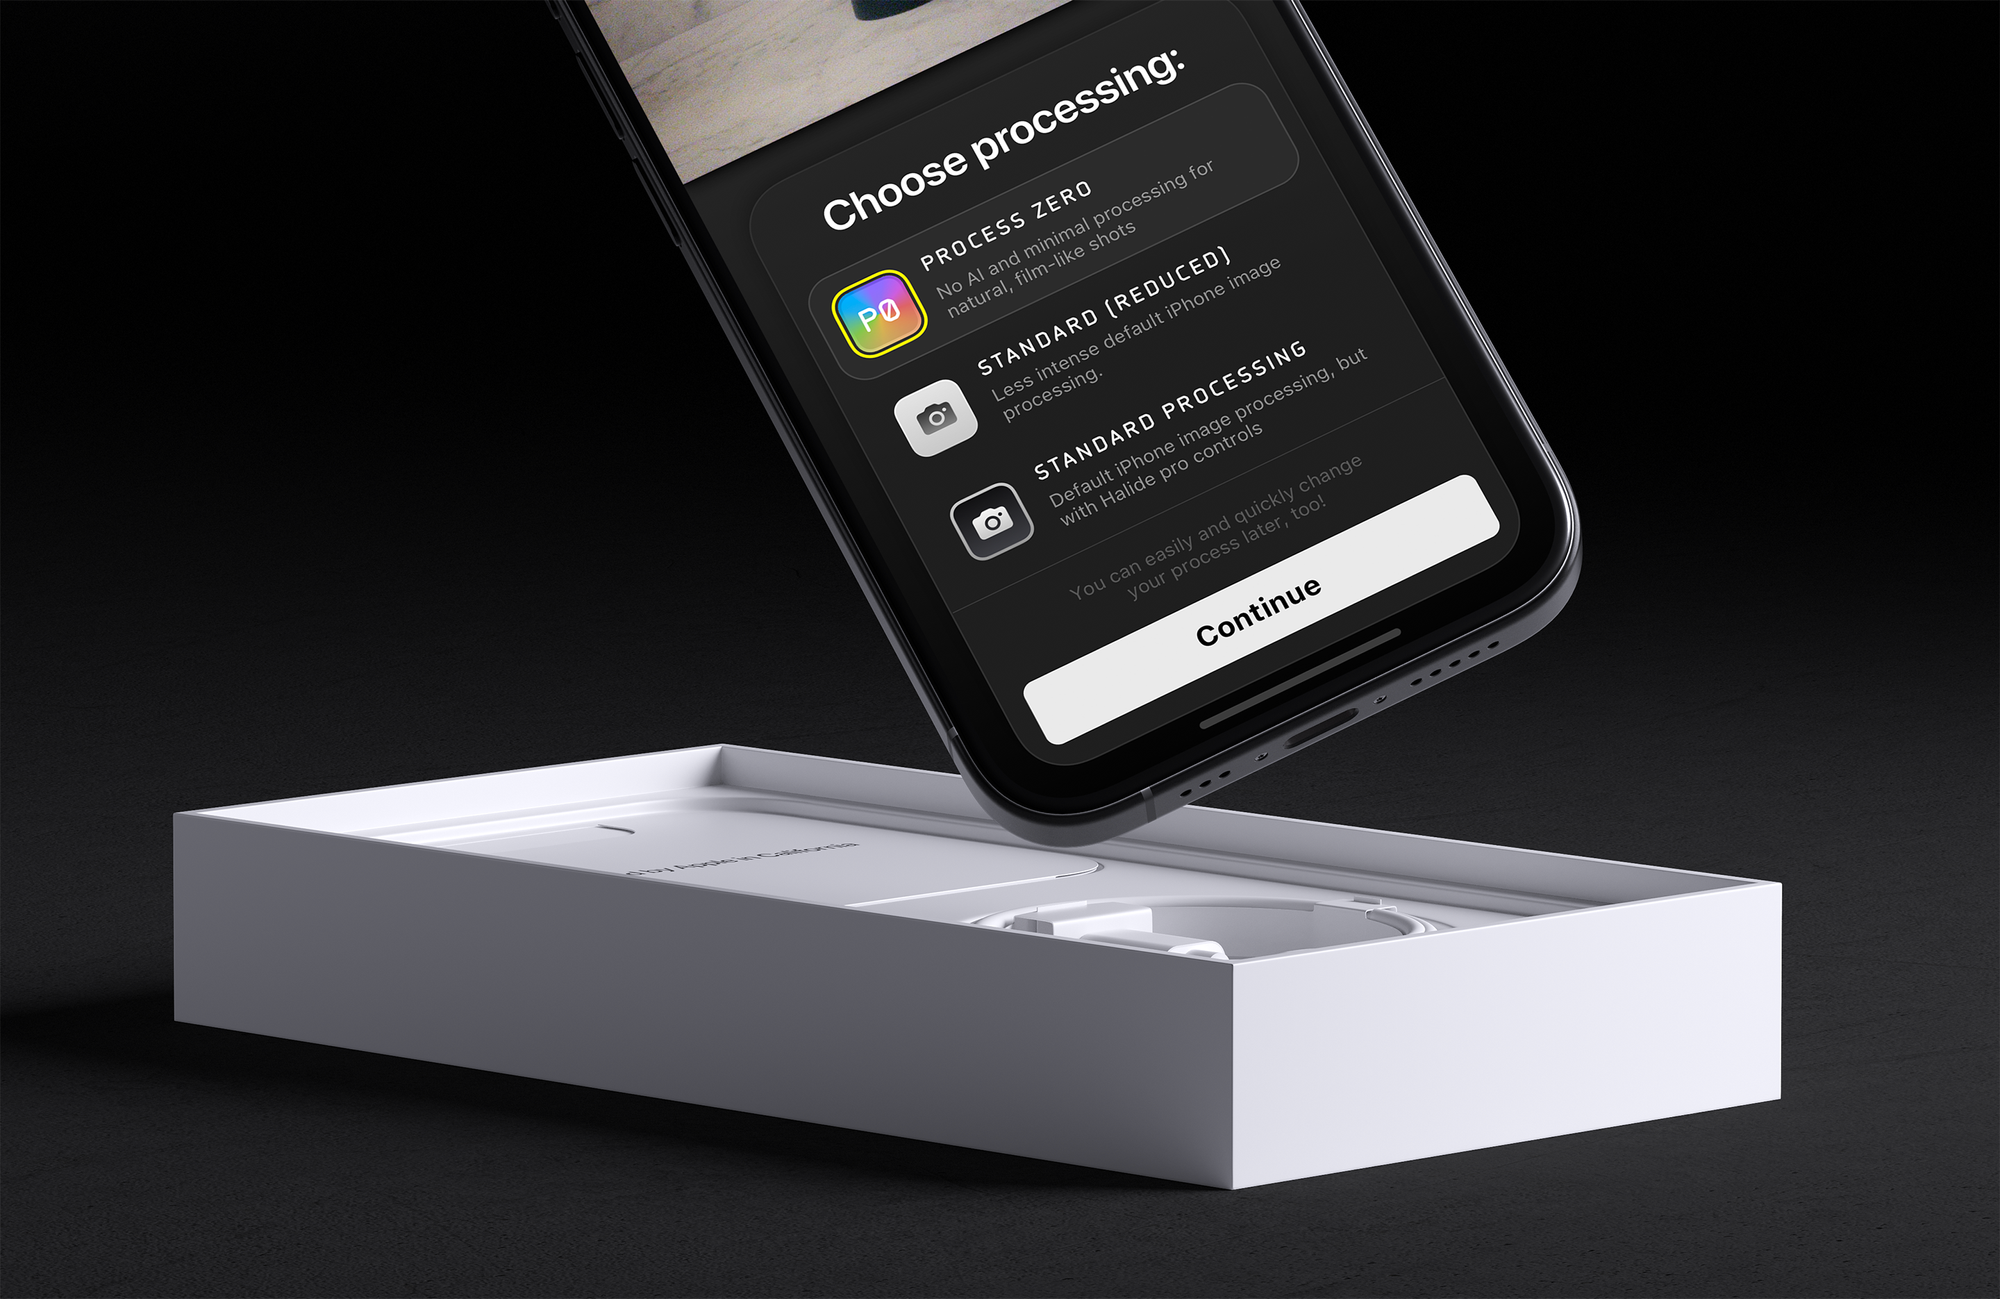
Using it is simple: when you first set up Halide, you can pick a process:
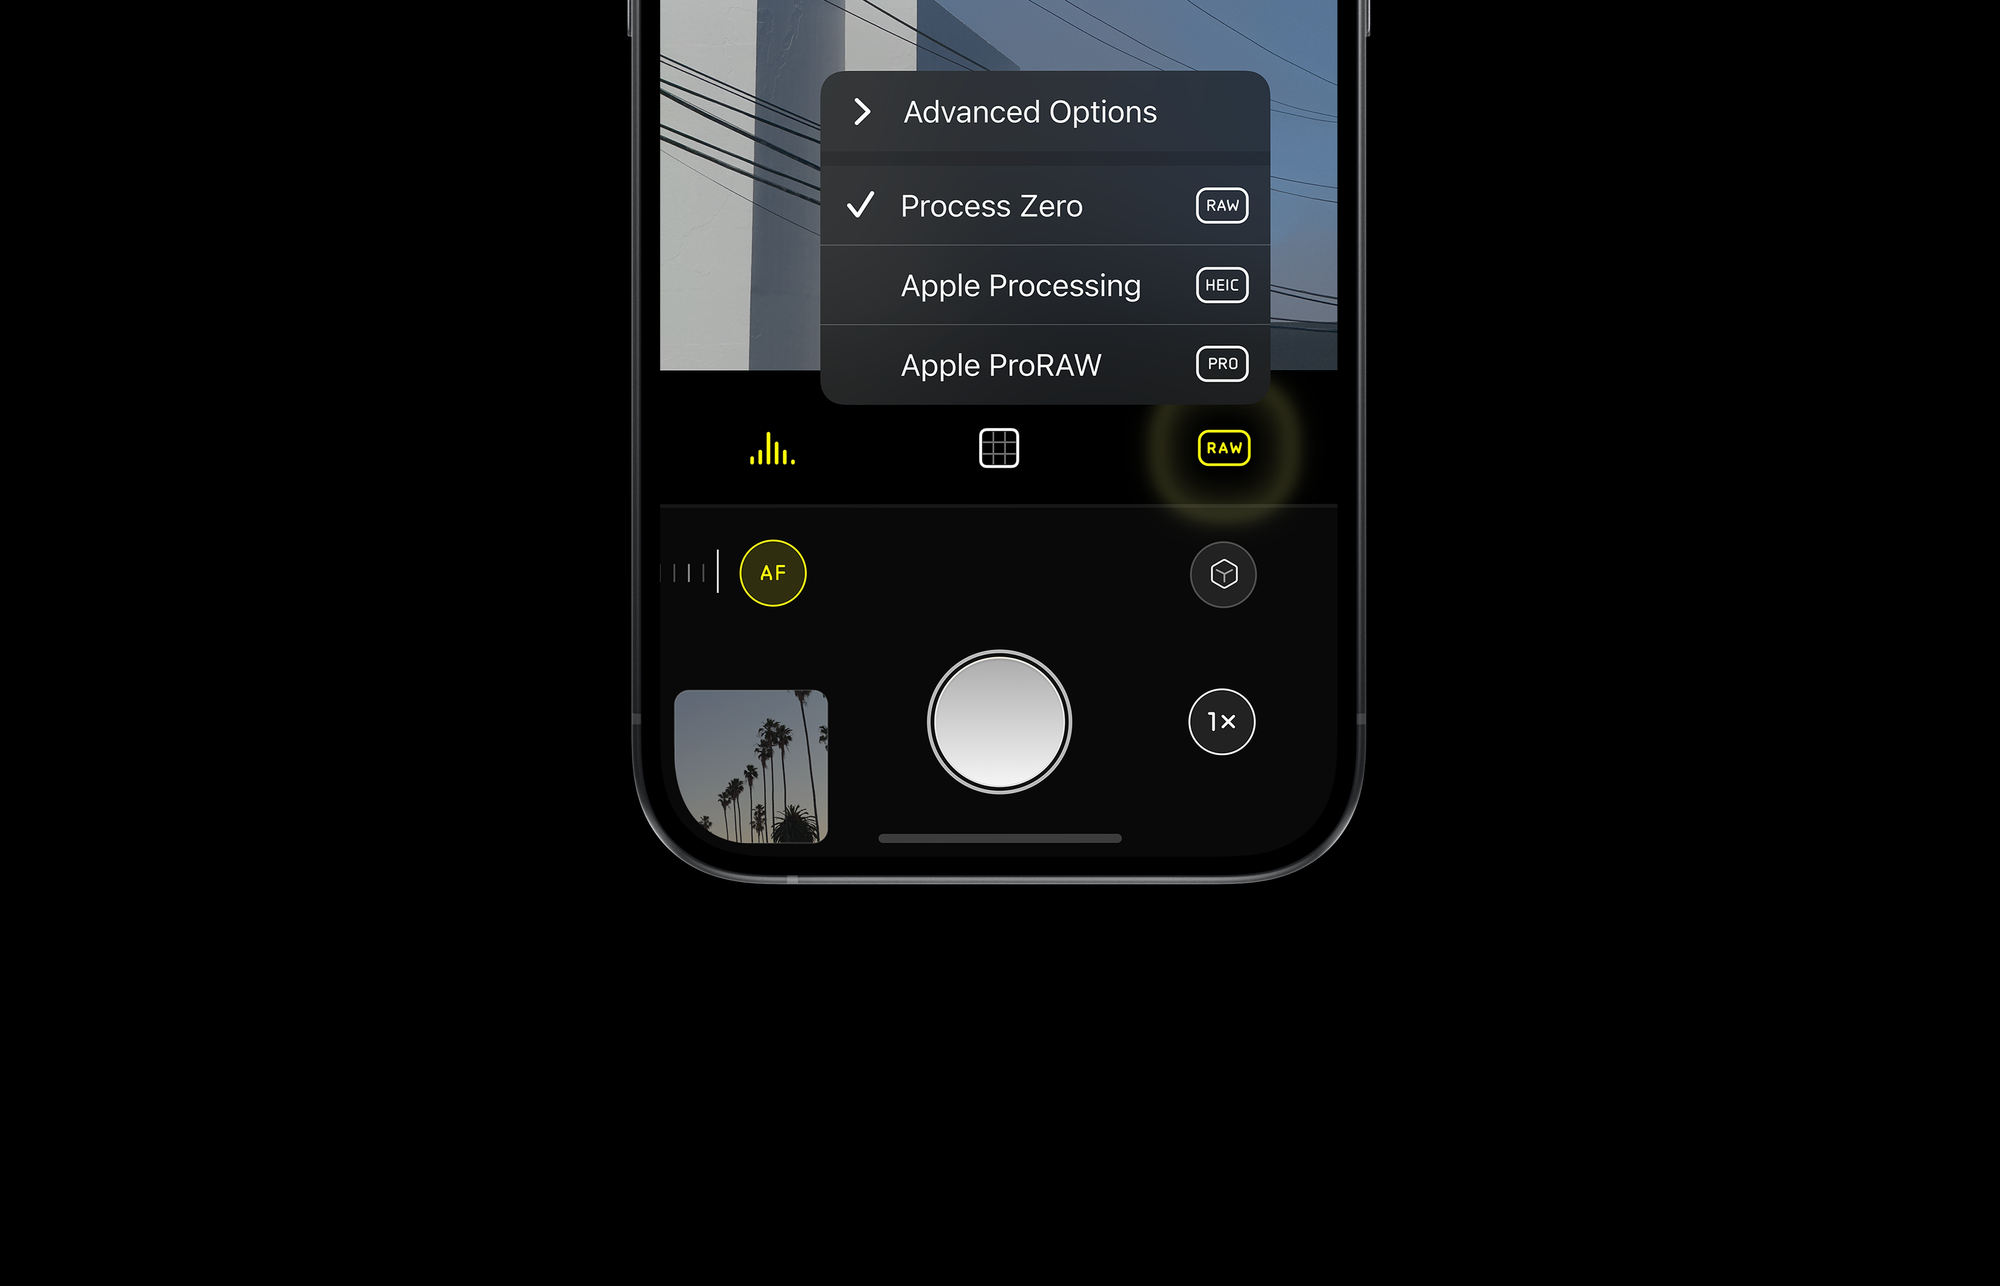
But as we point out there, you can always change this later. The most convenient place is the format picker in Halide: you can reach it in the ‘Quick Bar’, or the row of icons you see under your viewfinder. Swipe it up and tap the ‘RAW’ (or ‘HEIC’ / ‘PRO’) icon:
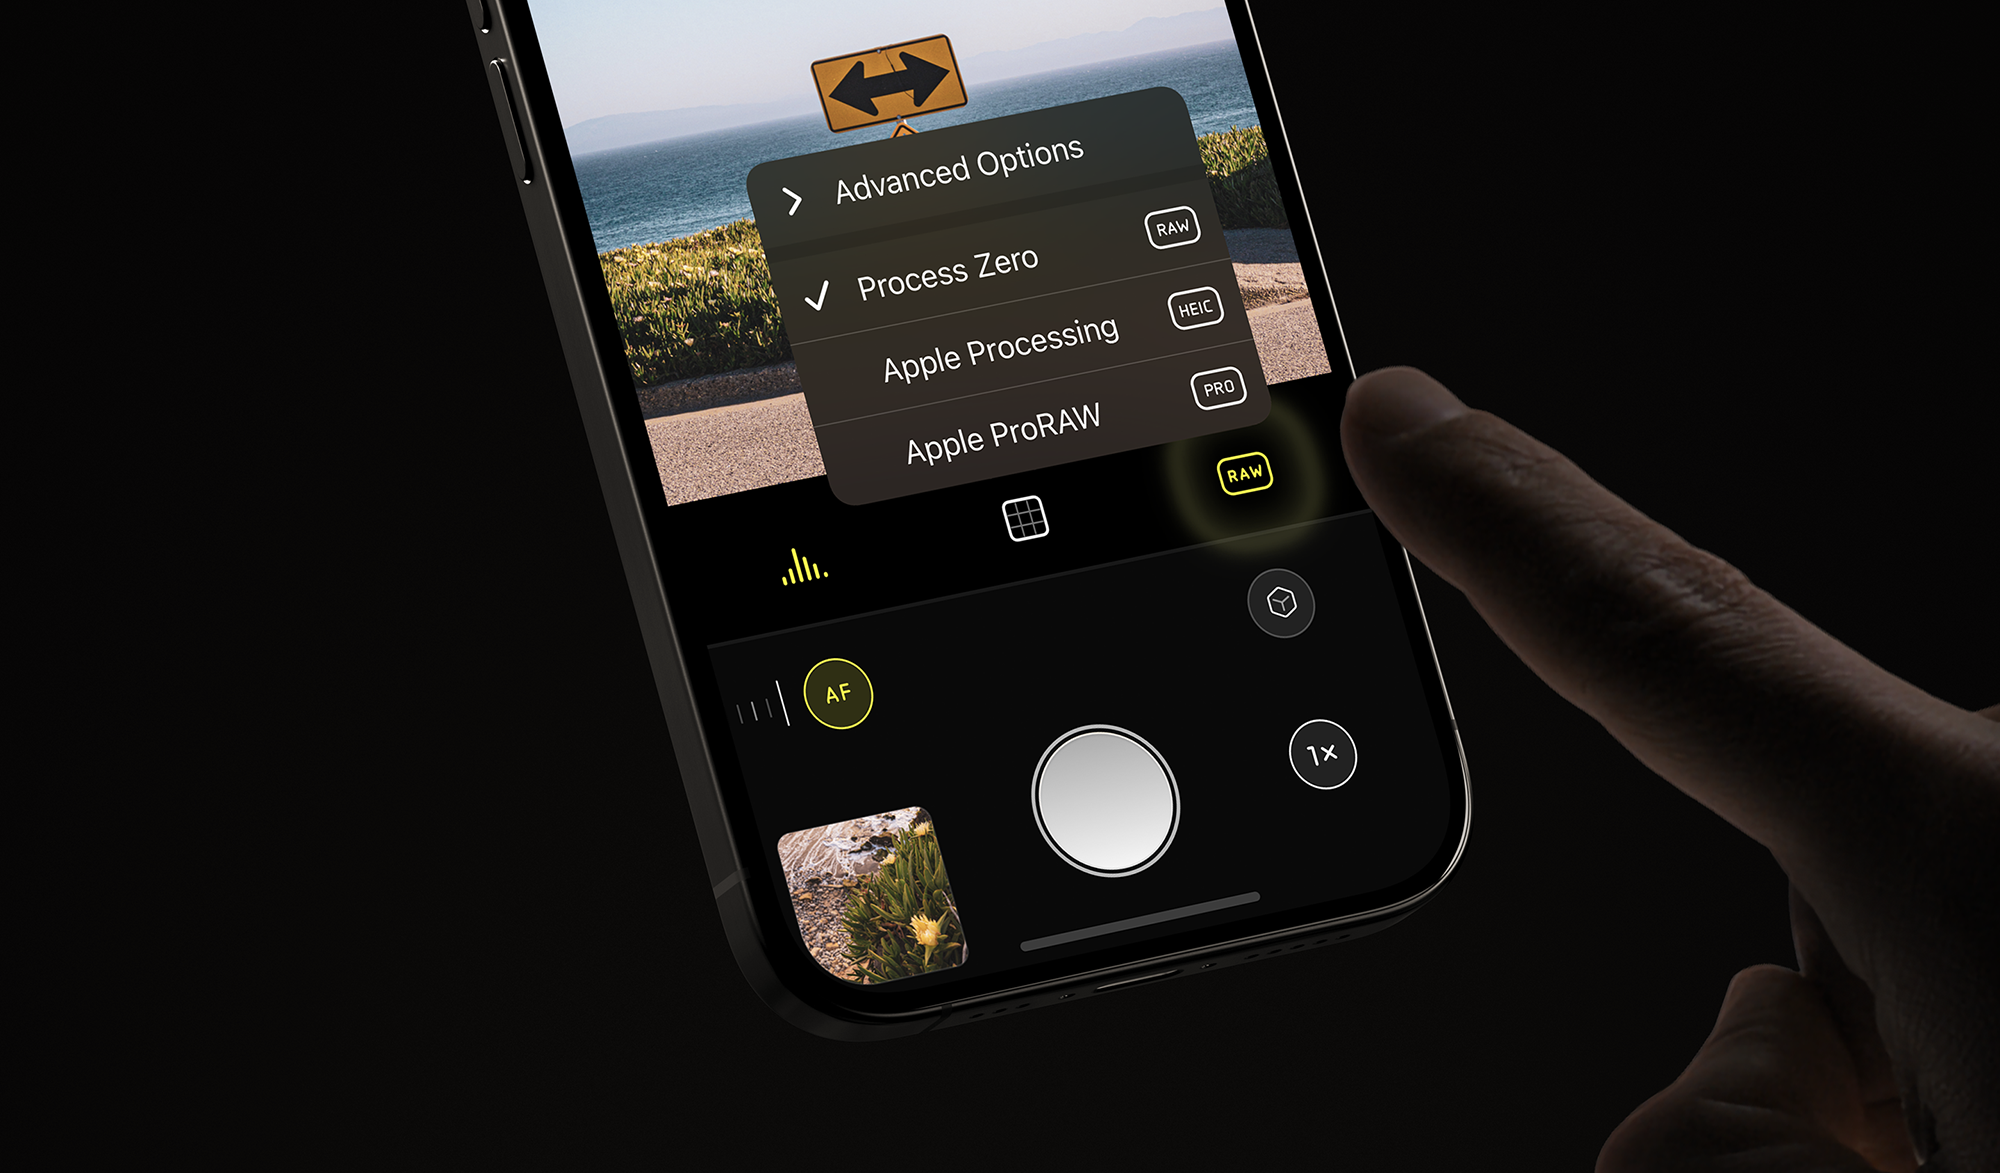
Here, you can switch your process with a tap. You can also choose advanced capture settings, like adjusting your resolution from 12 to 48 megapixels on newer iPhones for HEIC and ProRAW captures with regular iPhone processing. We sadly cannot take 48 megapixel Process Zero photos due to system limitations.
That’s all there is to it. Now you are shooting with Process Zero!
What about using Process Zero photos?
This is managed elegantly.

We save both the raw sensor data and a Process Zero JPG or HEIC with in your shot. Any app will get the Process Zero snap, but if you want to edit it more and open the photo in a RAW editor like Lightroom, it will open the raw data instead.
What are the limitations of Process Zero?
Process Zero cannot use a few computational nice things. For instance, on iPhone 14 Pro and 15/15 Pro, it does not have a ‘2×’ lens. It can also not take 24 or 48 megapixel photos.
Both of these limitations are because we do not get 48 raw sensor data from iOS. We’ve filed a request with Apple for this, as we'd love to have it added in the future.
It also does not work with Night mode or Portrait mode because — you guessed it — iOS limitations at present.
My Process Zero image looks a lot darker or lighter than what I saw. Why is that?
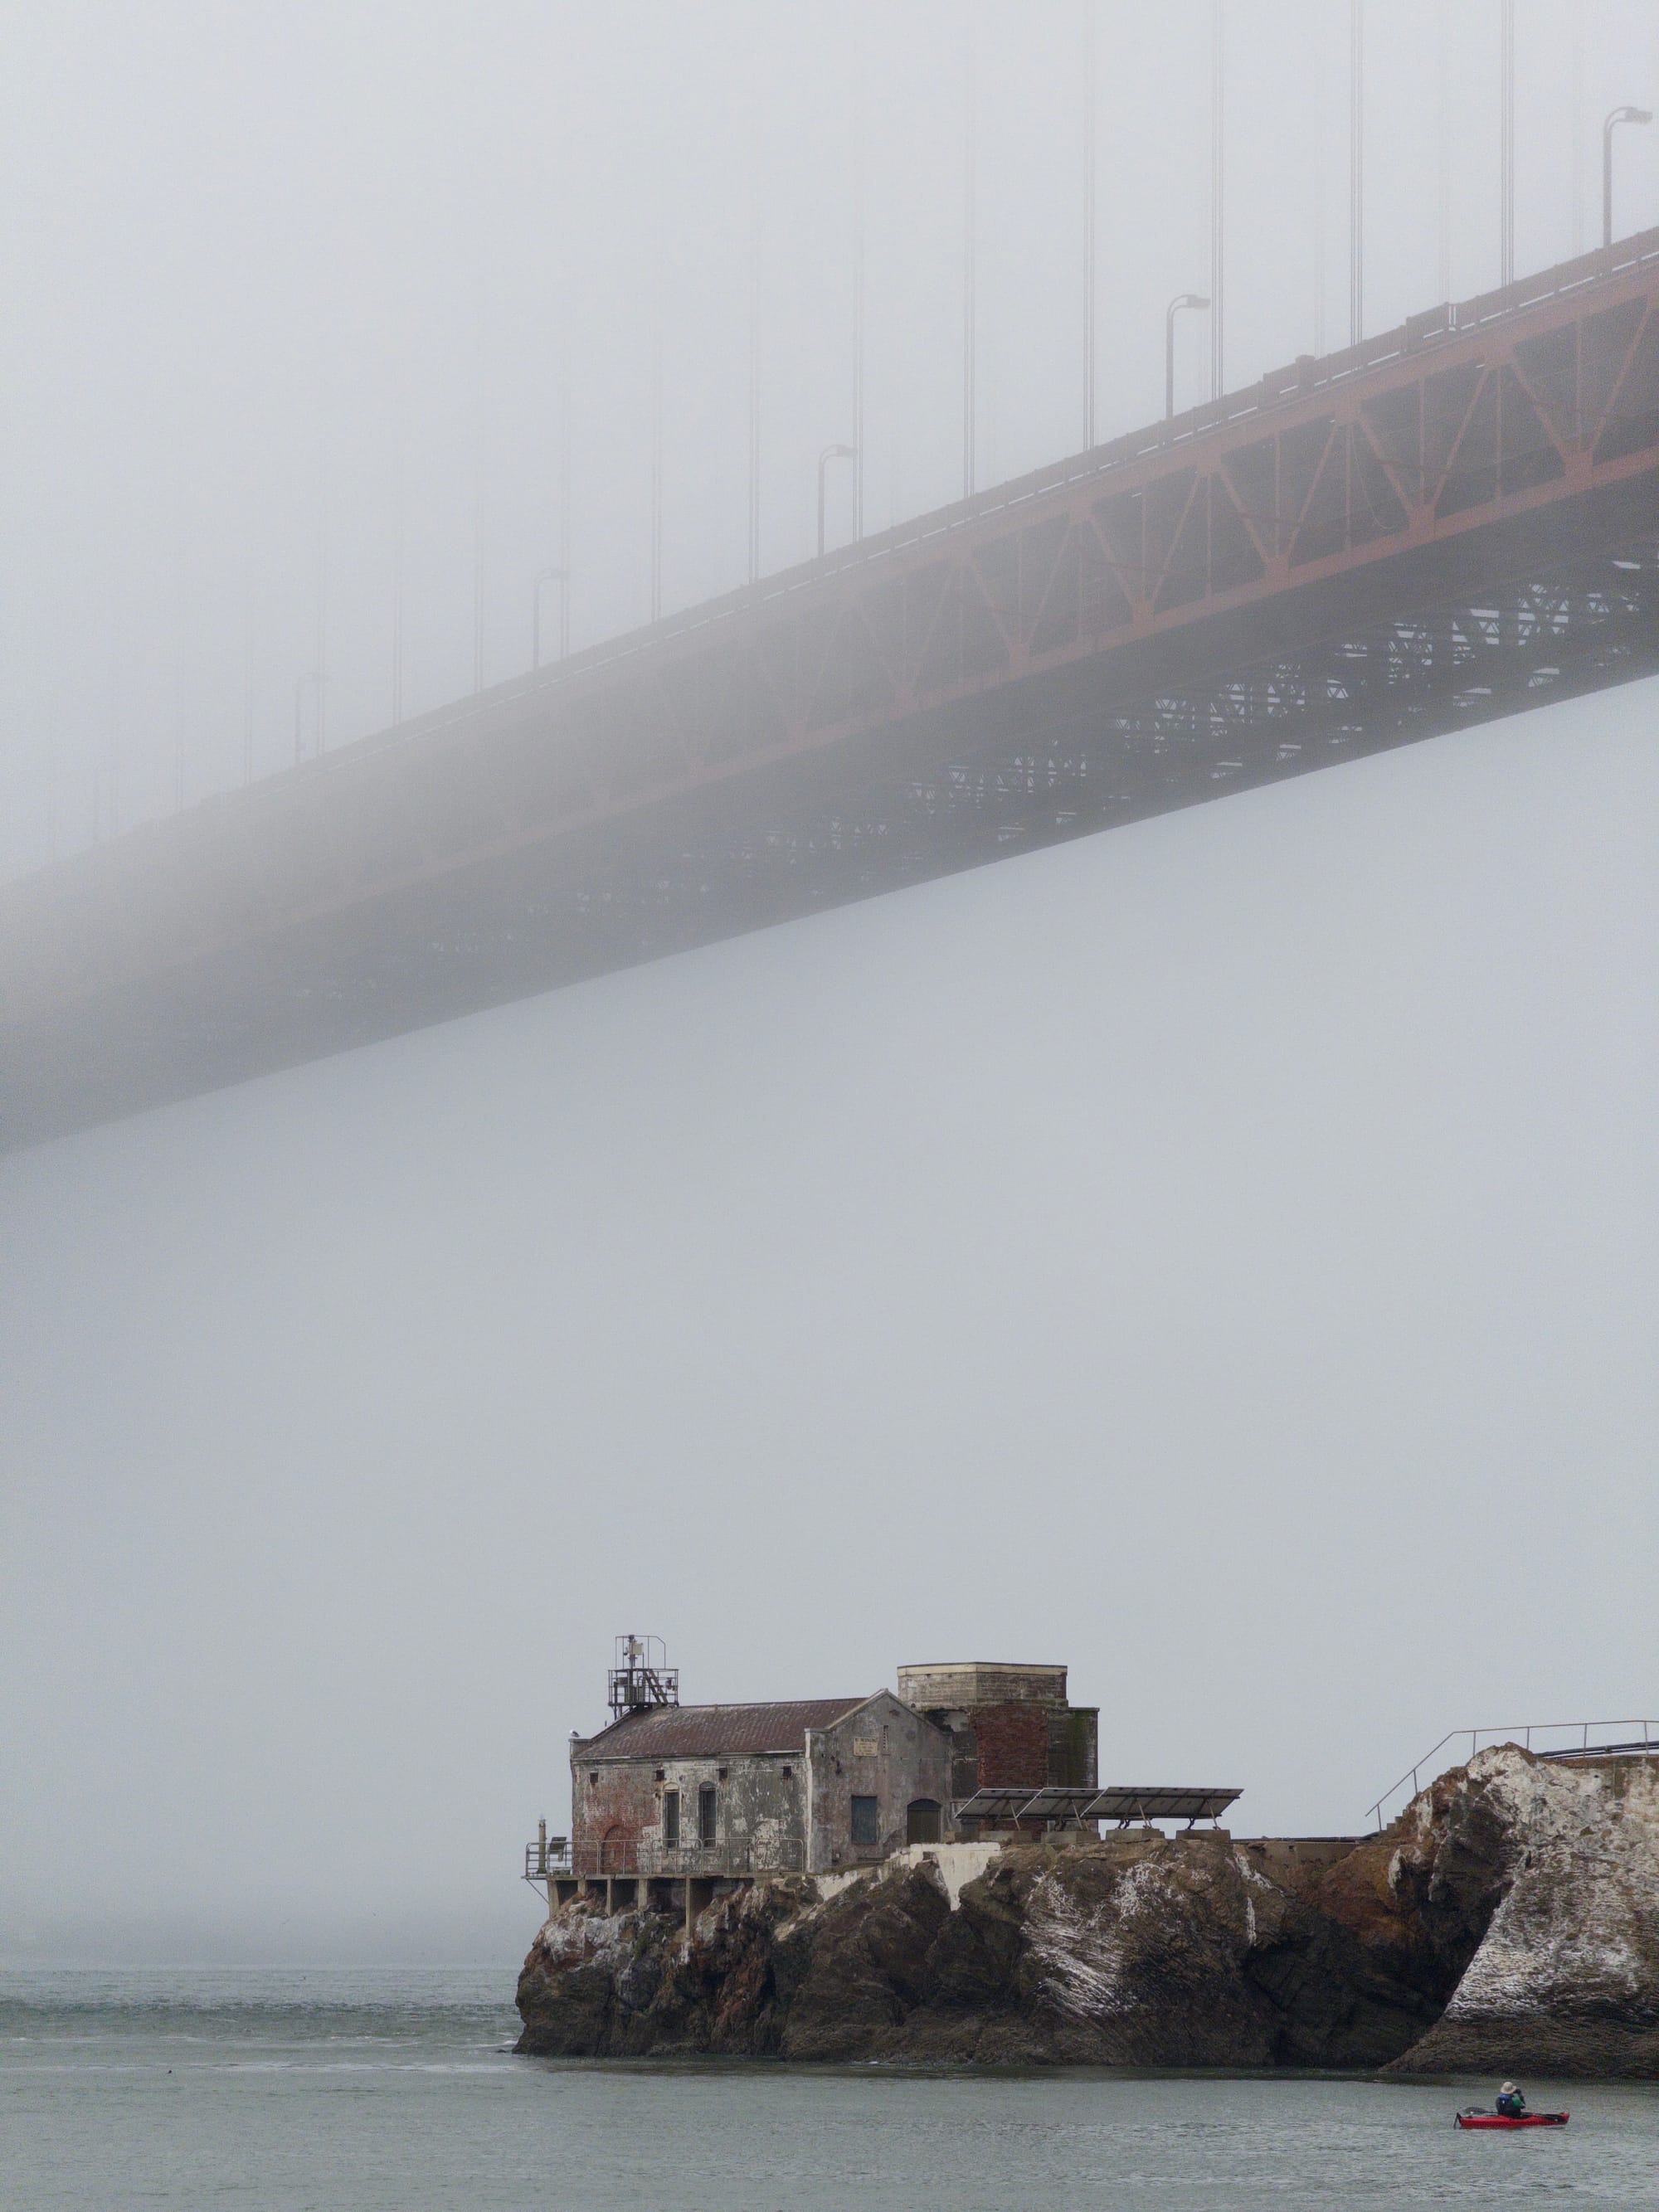
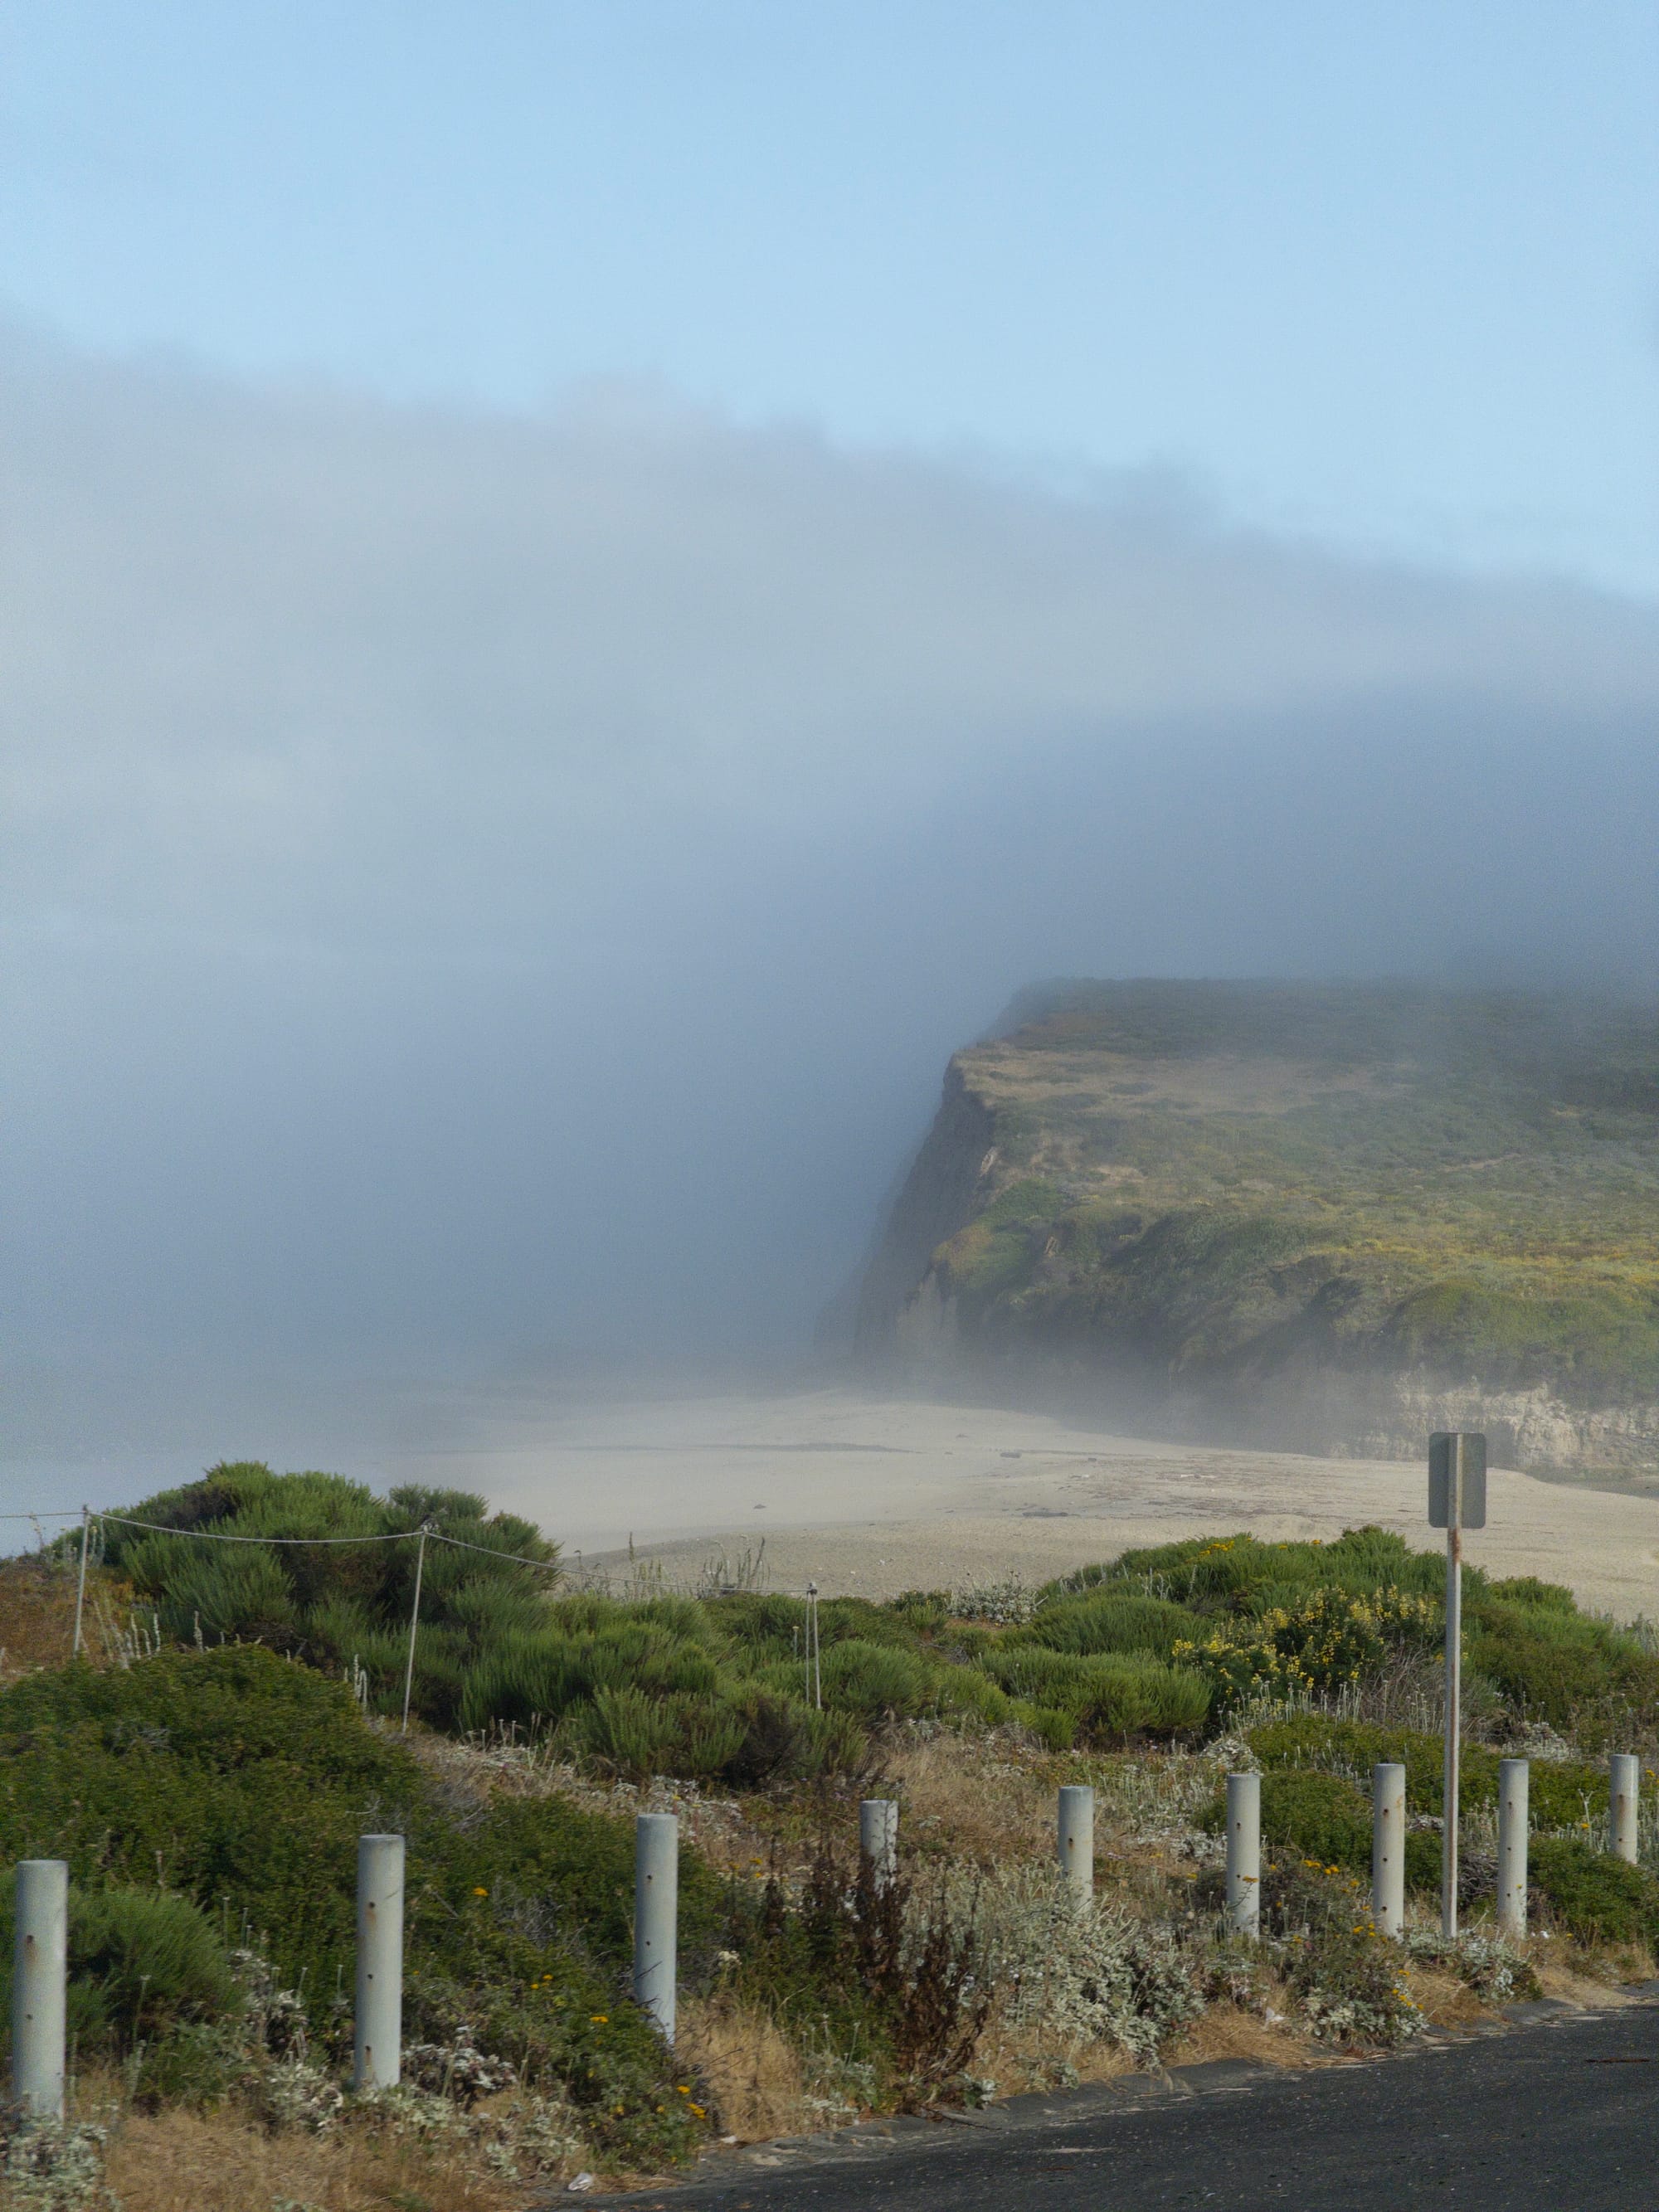
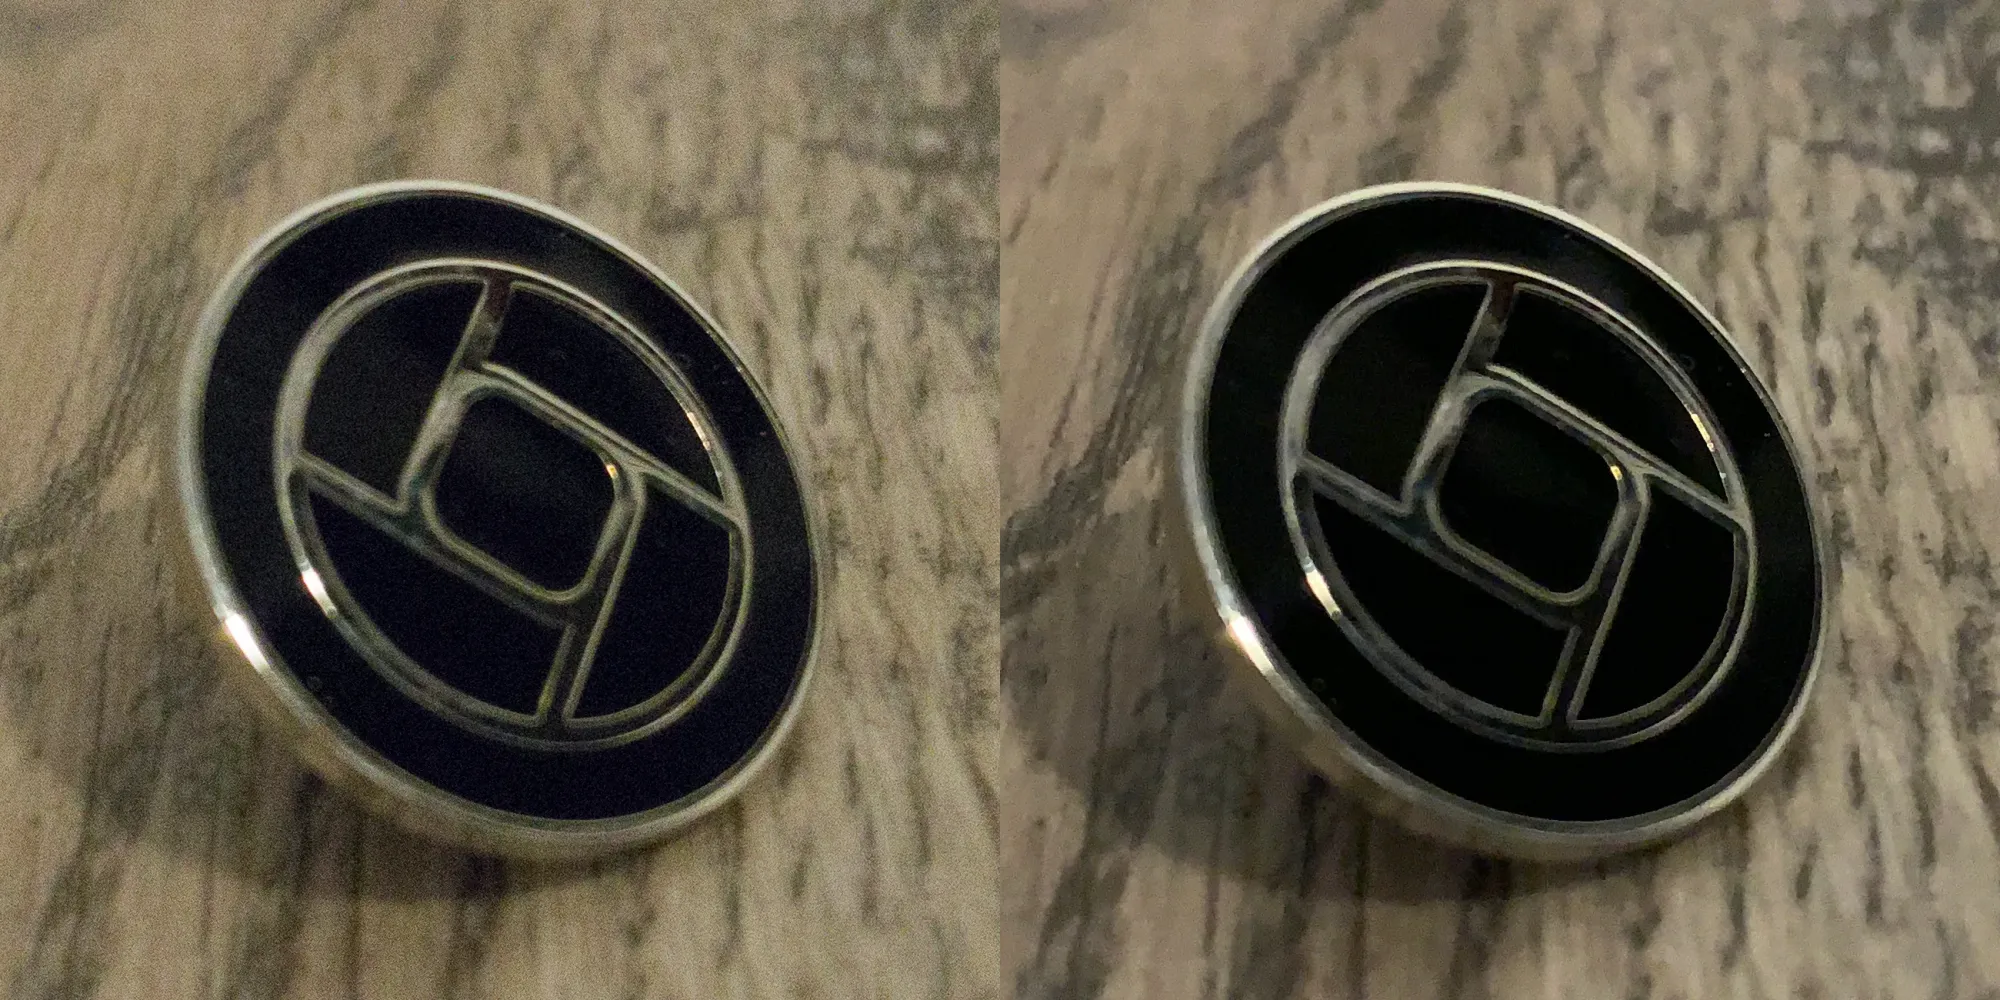
Multiple images are combined in the default process for several reasons: one for them is to achieve something called ‘HDR photography’. HDR boosts the shadows and eases the highlights so very bright and very dark areas of your image get more detail. It does that by taking a photo that’s a bit too bright and a photo that’s a bit too dark along with the regular one and merging them.

The image on the left used HDR to keep the sky more blue and dark, when it was actually quite bright.
Process Zero doesn’t do this. That means that sometimes, if you photograph someone up against a bright window, you will have to choose if you want the window exposed well or your subject. If you want both, we recommend using iPhone’s default processing instead.
You can also, however, use that raw data we captured to tweak your exposure later! And it’ll result in a beautiful image. Just tap the +/- icon while you view your photo in Halide, to access the Image Lab.
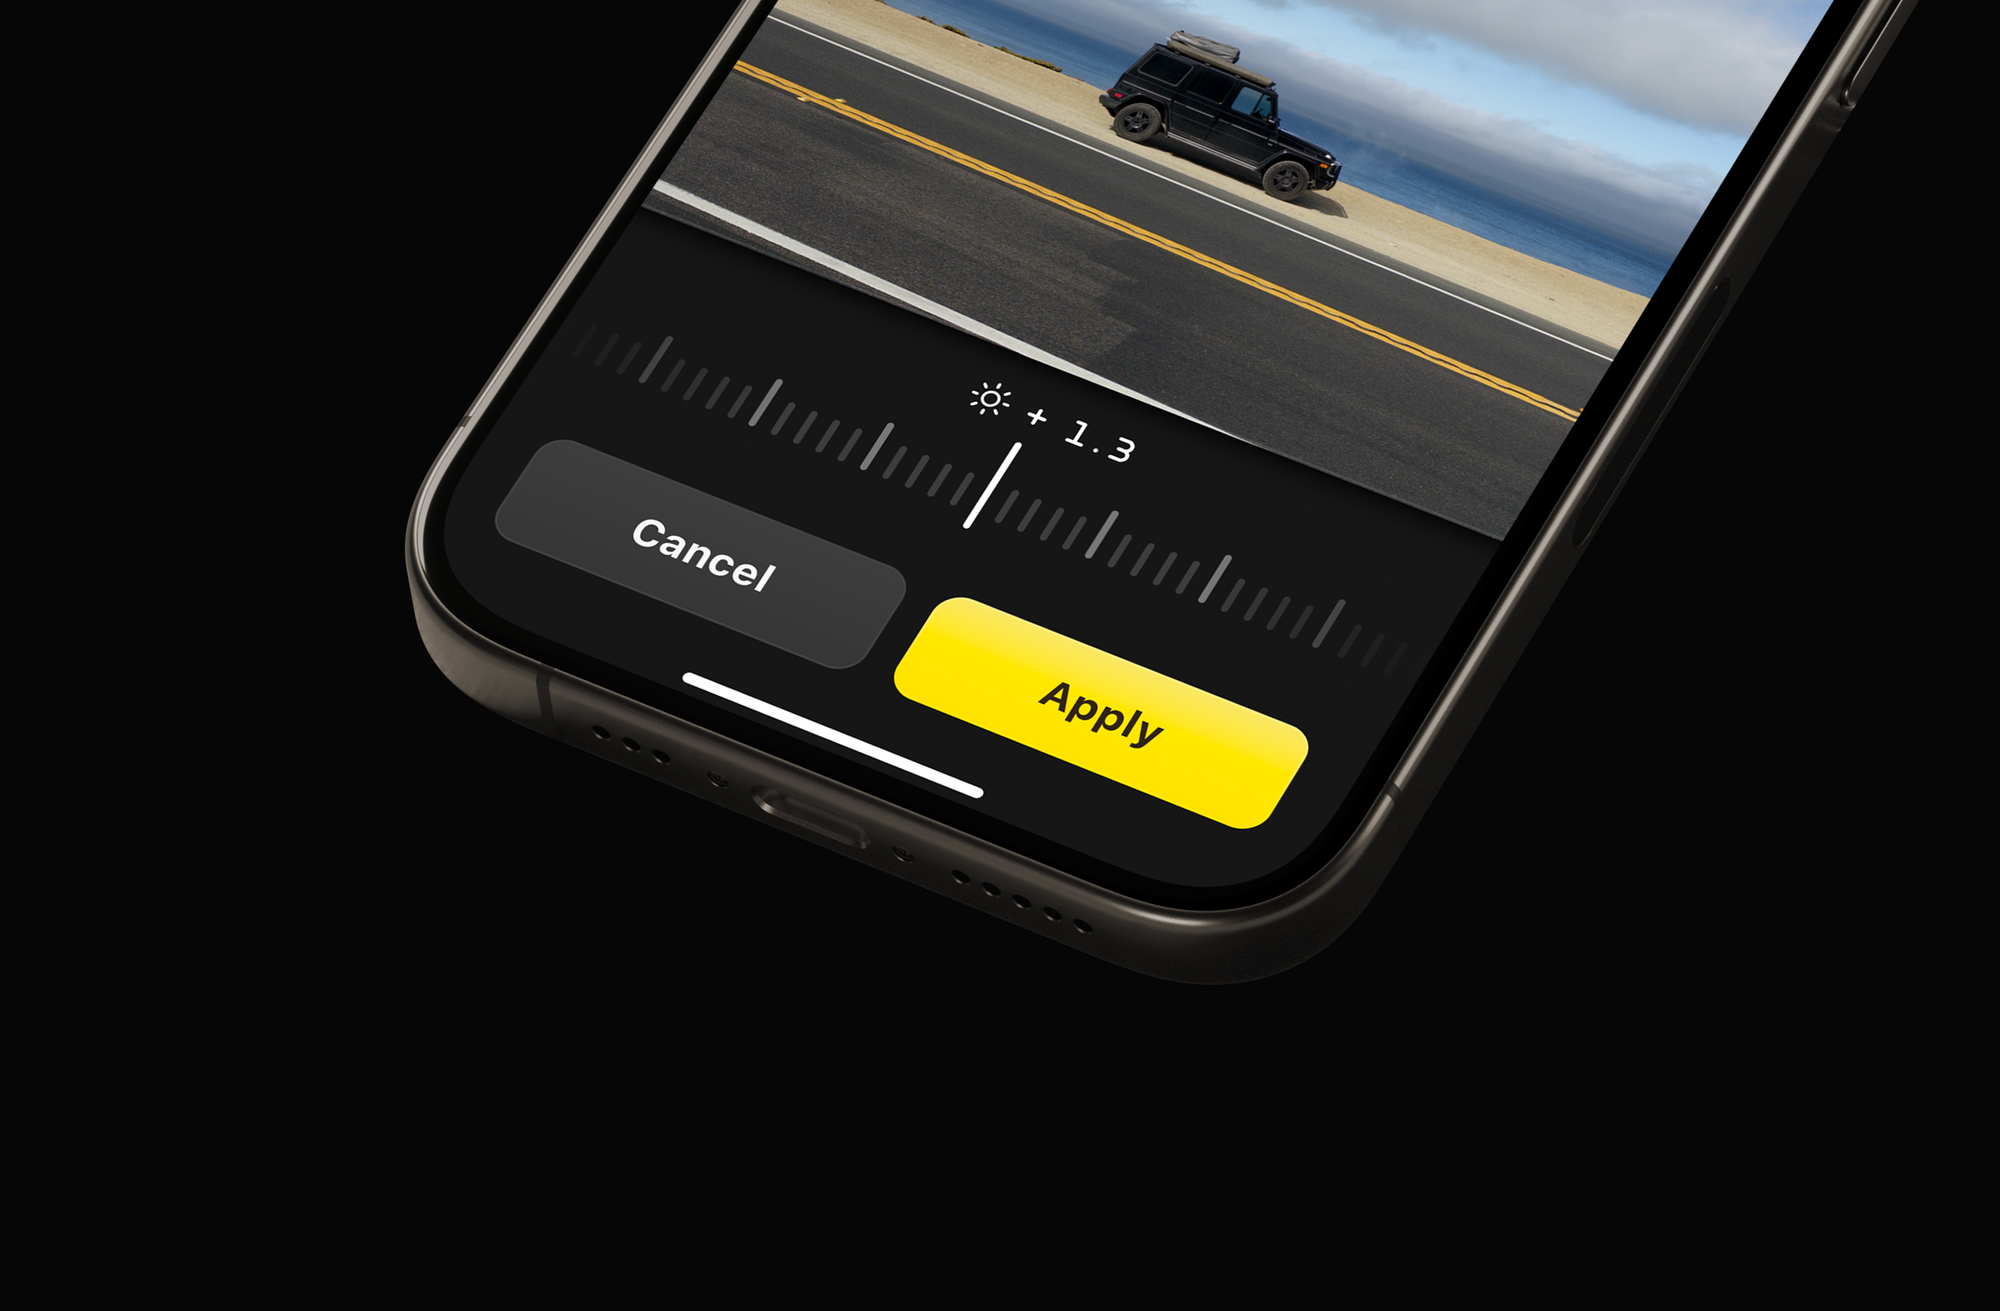
The Image Lab isn’t just a brightness slider: it will re-process the raw sensor data to produce a new Process Zero shot with more or less exposure. This can really help if you just want to tweak the shot to expose the right thing. Once you press ‘Apply’, a new Process Zero photo is saved and the raw data is kept intact for future edits.
This is just a RAW photo, isn’t it?
Great question: yes and no.
RAW photos on iPhone are a bit complex now. Your iPhone might be able to take a RAW photo as a ProRAW. Apple introduced ProRAW a few years ago (only on Pro iPhones) and it’s actually not technically a raw file.
ProRAW gives you the benefits of Apple’s processing — because it is already a result of many combined images. Those images have to be somewhat processed and turned from raw sensor data to an image to get combined in the first place.
iPhones — pro or not — can also take ‘Real' RAW files (or just, raw, it’s not an abbreviation). Regular bayer, or ’native’ raw files are a way to take a photo and retain the actual data your camera sensor saw. Note data: that’s not even really an image yet: think of it as a spreadsheet with values for the little photo sites on your sensor. Some of these tiny spots on the sensor see red, some blue, and many more see green. If you store all those values with some extra info you get the raw sensor data. And if you process that data, and combine them in your own unique way (Apple, Adobe, etc all do this a bit differently) you can turn that into an image and then save it as, say, a JPG.
There’s no such thing as just showing a raw image on your screen. You have to process it. There’s more color information in that raw file than your screen can even display!
Previously, Halide either shot a ProRAW file with Apple’s processing, or a native raw file and let whatever app you opened it in process it, or we shot a JPG along with raw (by default we did this) that used Apple’s camera processing.
Process Zero is our own way to process that data, and we do it minimally but with our own flair to make it look nice. We think it’s pretty good, but we make sure to save both that raw data and the Process Zero-processed JPG/HEIC alongside one another in one file. That way, if you open up your shot in a raw editor, it’ll grab the raw data and you can edit to your heart’s content. If you share the shot on Instagram, however, you get your Process Zero shot.
My image looks quite grainy. Why is that?
There’s two things at play here. One is image merging: the other is noise reduction.
Think of noise as a random change to pixels in your image. If you combine or merge many images for one photo, that noise will ’travel’ and be in different places for every shot. Combining shots always removes noise, and Apple’s default iPhone processing always combines multiple images.
Now for noise reduction. As your camera gets less light, it will produce a noisier image. For a long time, iPhones counteract this with noise reduction - counteracting the noise by filling in colors from nearby pixels in place of the noise. That can produce a ‘smeared’ or ‘watercolor’ like look, smoothing over details. Without that smearing, the image would be quite noisy. More modern noise reduction even uses AI to ‘fill in’ details that might have gotten lost. It kind of imagines what the details might have looked like.
We don’t do that with Process Zero. Sometimes, with low light that means your shot is going to turn out noisy. You can always attempt denoising in an editor later; Lightroom, for instance, offers advanced noise reduction tools. Or you can choose to embrace the grain! It’s a bit like film.
You can prevent noisy photos by adding more light, or to switch to manual — swipe in from the right side of the screen, tap ‘Manual’, and set your ISO to a lower value. We find most iPhones produce the least noisy photos in Process Zero under 1600 ISO.
My photo is looking different in Photos than in Halide. Is it supposed to be that way?
Not really. Tap the ‘Format picker’ in Halide, then press ‘Advanced Options'
You should verify that ‘Save HEIC (or JPG) with RAW’ is enabled here. If it is, Photos will show the Process Zero shot Halide created along side the raw data. If it isn’t, Photos will process the raw data itself, which usually isn’t great.
My question isn’t answered here, I have another problem, or I just want to tell you I like this a lot!
We hope this resource was useful! You can get more help here or email us directly here. We’re a small shop, but we do read all our email personally and hope to get back to you soon.
If you love Halide and Process Zero, the best way to support us is with a review in the App Store and by telling your friends! We even share the best shots you share online if you tag us on social media, or tag your shot with #processzero.