


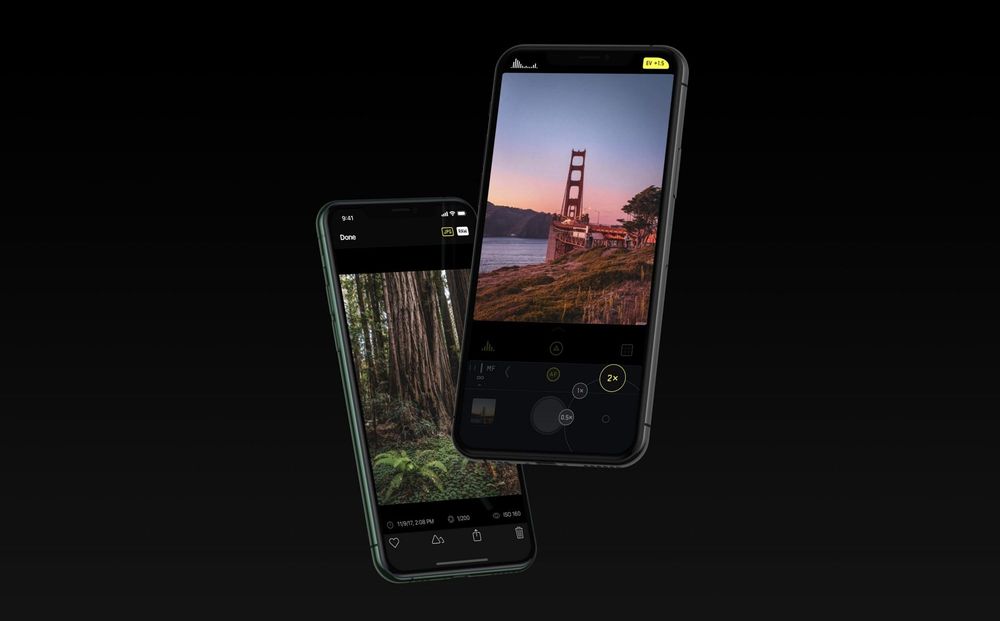
Last month, we took a look at what is new in the iPhone 11 and 11 Pro’s camera hardware. You might’ve noticed two things from Apple’s iPhone announcement event and our blog post: the hardware changes seem fairly modest, with more attention directed at this generation’s software based processing.
It’s true: The great advances in camera quality for these new iPhones are mostly to blame on advanced (and improved) software processing.
I’ve taken some time to analyze the iPhone 11’s new image capture pipeline, and it looks like one of the greatest changes in iPhone cameras yet.
What is a photo?
That sounds like we’re off to a rather philosophical start, or delivering the punchline of an iPad photography commercial, but to highlight what makes the iPhone 11 camera unique we have to understand our expectations of photography.
For a while now, you haven’t been the one taking your photos. That’s not a slight at you, dear reader: When your finger touches the shutter button, to reduce perceived latency, the iPhone grabs a photo it has already taken before you even touched the screen.
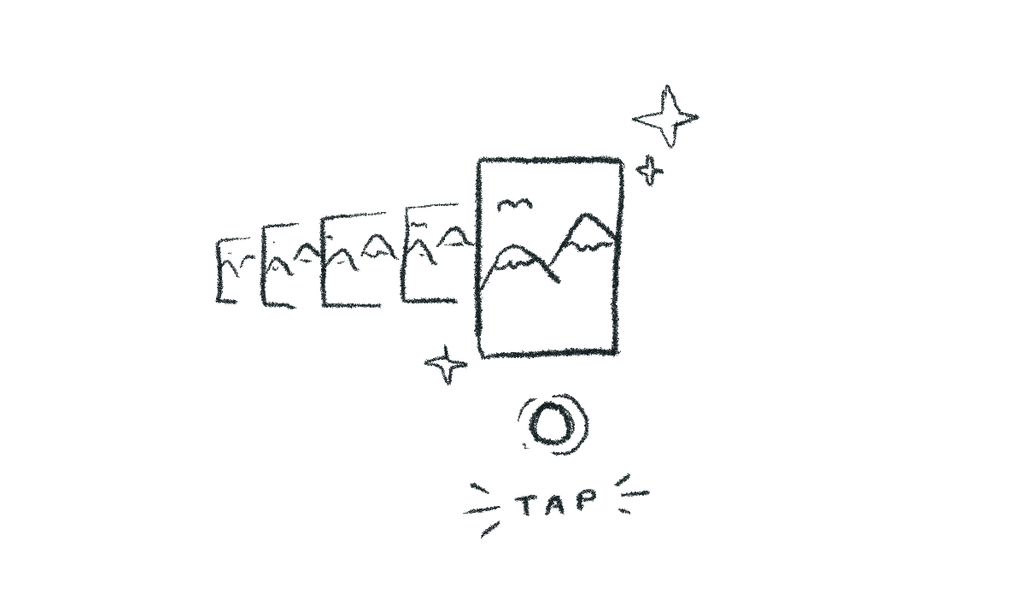
This is done by starting a sort of rolling buffer of shots as soon as you open the Camera app. Once you tap the shutter, the iPhone picks the sharpest shot from that buffer. It saves a shot you, the user unaware of this skullduggery, assumes you have taken. Nope. You merely provided a hint, to help the camera pick from the many shots it had taken on its own.
We can argue this is still deliberate photography. Without your action, there would be no photo.
The resulting image is not a single exposure, either. The iPhone takes a multitude of exposures — going by Apple’s presentation, a whole lot— and intelligently merges them.
Last year’s iPhone XS introduced Smart HDR, which combined over- and underexposed shots to ensure your image has more detail in the shadows and highlights. HDR is shorthand for ‘High Dynamic Range’, and for decades it’s been something of a white whale in photographic technology.
Smart HDR Gets Smarter
Ever since humans put silver halide (hey, that’s our app’s name) on a plate to capture a still image, we have been frustrated by a photograph’s limited ability to capture details in both light and dark areas.

Our eyes are actually really good at this sort of thing. It’s estimated they have 20 ‘stops’ of dynamic range. As a comparison, one of the latest and greatest cameras, the Sony A7R4, can capture 15 stops. iPhone 11 is around 10 stops.
Long before digital, film photographers ran into the same problems when they went from film negative (13 stops) to paper (8 stops). They would dodge and burn the image when developing to get everything within a printable range.

Today, a skilled photographer can recover dynamic range from a single RAW photo through editing. It’s just a manual process, and in extreme situations you’ll run up against limits of the sensor.
Smart HDR takes a very different approach by ‘cheating’ its way to better dynamic range. You don’t need a 15-stop sensor that can resolve more detail in light and dark areas at the same time — you just need a sensor that can take images fast enough, and smart software to merge them. The ‘editing’ happens in real time, without any action from the photographer.
As we wrote last year, it comes with trade-offs. Keeping the iPhone sensor biased towards rapid, short exposures causes much noisier images, something RAW files from iPhone XS and XR cameras confirmed. This requires noise reduction, which has a side effect of losing details.
Interestingly, this noise reduction led to the accusation Apple was applying a skin-smoothing ‘beauty filter’ to every shot. In fact every texture was getting smoothed. It made for better shots much of the time, but the loss of detail was noticeable. Images looked soft:
That made shooting in RAW a compelling option for advanced iPhone photographers. The detail was retained, and with something like Halide’s Smart RAW or manual exposure settings noise was kept (mostly) manageable. With a RAW editor, very often you could recover dynamic range just as well as Smart HDR. I preferred it to the iPhone XS/XR’s ‘processed’ image look.
But when the iPhone 11 arrived, I immediately noticed a staggering improvement from its predecessor. Smart HDR got… well, smarter.
On iPhone XS and XR, Smart HDR was heavy-handed at times, smoothing out texture in places or flattening highlights when unnecessary. Sometimes it failed entirely, and refusing to let an overexposed shot just be overexposed.

This is a classic problem in HDR. Sometimes you’ll recover dynamic range at the cost of a flat image without contrast; a sunset shining brightly on someone’s face could look a bit dull. At worst, it totally ruined photos. Smart HDR was so biased against highlights that it became very easy to spot images shot with the iPhone XS and XR by their ‘look’ alone.

On the iPhone 11, the camera knows that sometimes you want highlights blown out. That’s smart — smarter Smart HDR, if you will.
The Devils of Detail
iPhone 11 photos showcase a remarkable amount of detail.*
*For the purposes of this post of the series, I will judge the typical iPhone camera output. In iOS 13.2, Apple sometimes uses ‘Deep Fusion’ to further improve detail and sharpness. We will delve into that — how it works, what triggers it, and how it stacks up vs. RAW photography — in future post. Stay tuned.
Detail is something that we always want more of in photography. There’s a nearly irrational chase of ‘sharpness’ in lenses, a seemingly never-ending push for more megapixels in cameras and a constant discussion about how big of a sensor is required for a halfway decent photo.
We can see on iFixit (and in our hardware breakdown) that as far as the sensor goes, the size and megapixel count are the same as the XS. What is Apple doing to achieve so much more detail? There are two changes:
Hardware
While the changes in hardware are minor, there are clearly some improvements under the hood (under the lens?). Notable is the improved ISO range, which has gains of 33% and 42% on the main (wide) and telephoto camera, respectively.
What’s ISO? It’s a measurement of sensitivity to light. In the previous century, it specified the sensitivity of photographic film. For example, an ISO number above 800 is very sensitive, and even vulnerable to Airport X-Rays.

Today, ISO is a setting of your sensor. When you have less light, you can increase the ISO setting. This lets you can capture with a faster shutter speed, which creates a sharper shot. The trade-off is that a higher ISO produces more noise. That requires more noise-reduction, which results in less detail, like we showed earlier.
Many thought this higher maximum ISO on iPhone 11 sensors was used solely for night mode, but an improved ISO range also makes a noticeable improvement to everyday noise. You don’t have to use the new maximum ISO to see a difference. You’ll see less noise in most — if not all — of your shots.
There’s one notable exception: the minimum ISO of the iPhone 11 is a bit higher, which means at the baseline it is ever so slightly noisier than the iPhone XS and XR. However:

It appears the sensor resolves more detail despite the slightly added noise. It’s an improvement at every level.
At the same time, there’s only so much you can do with hardware. Folks have compared the iPhone 11’s results to a DSLR or other large cameras, yet this is how tiny the sensor is compared to the full-frame Sony A7R4 camera:
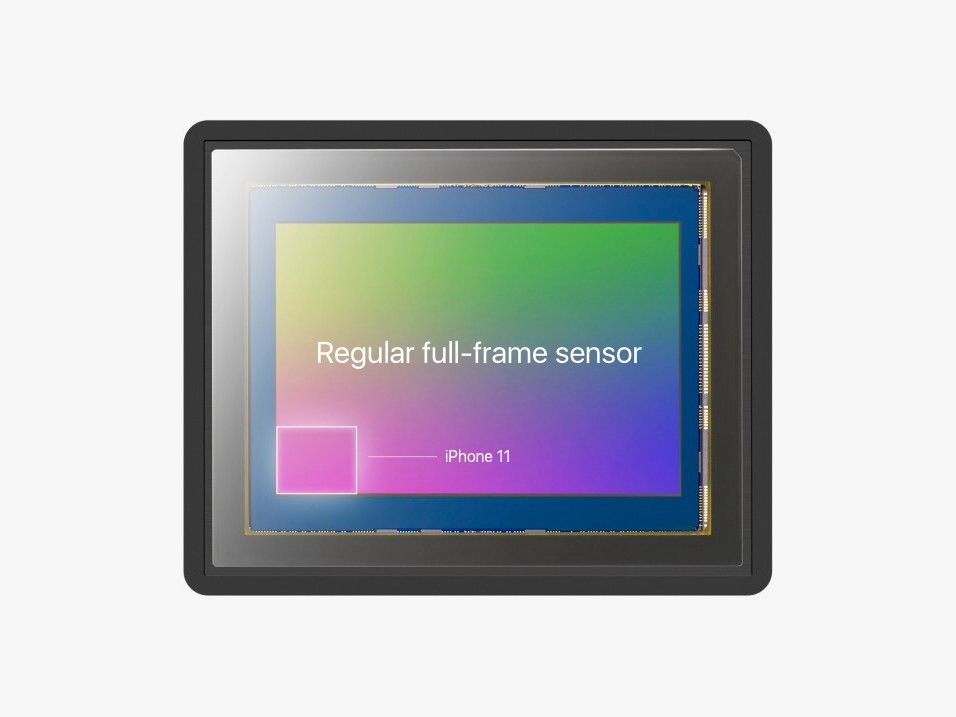
Yep, we’ll need magic for it to get good images. This year the magic has gotten even more sophisticated. Or rather, discerning.
The Big One: Selective Post-Processing
When editing your photo, you might opt to make changes to the entire image, like brightening the scene or enhancing sharpness across the shot. But you might also apply selective editing to some parts of the image, similar to how magazines ‘airbrush’ a model’s skin to look smoother.
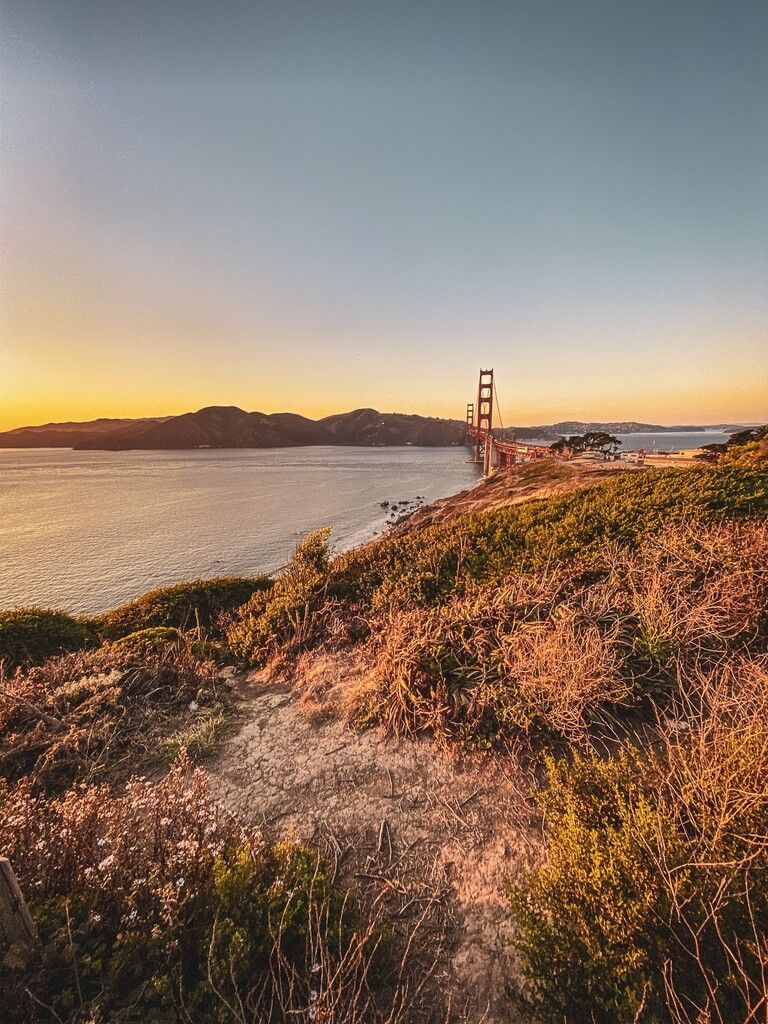
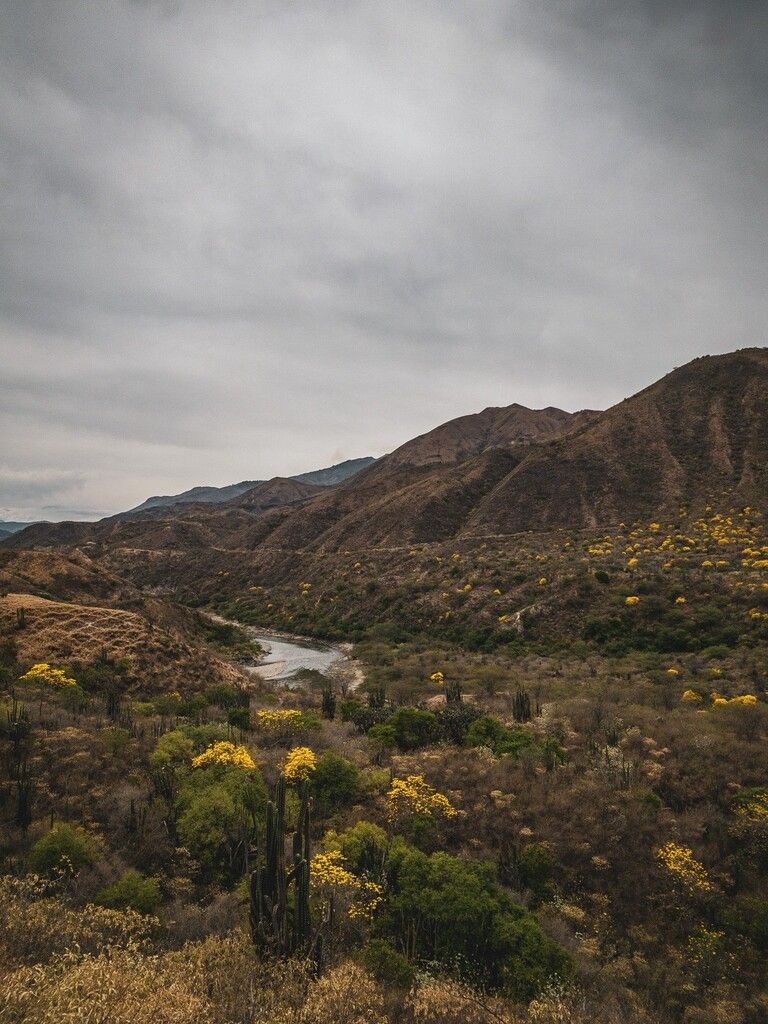
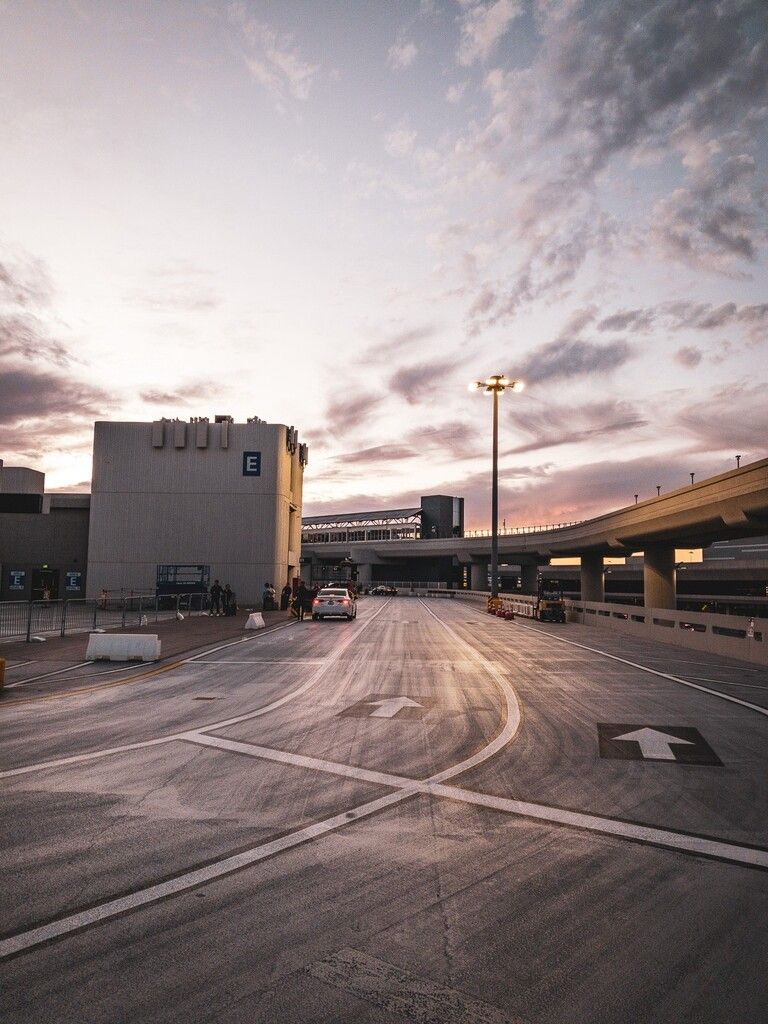
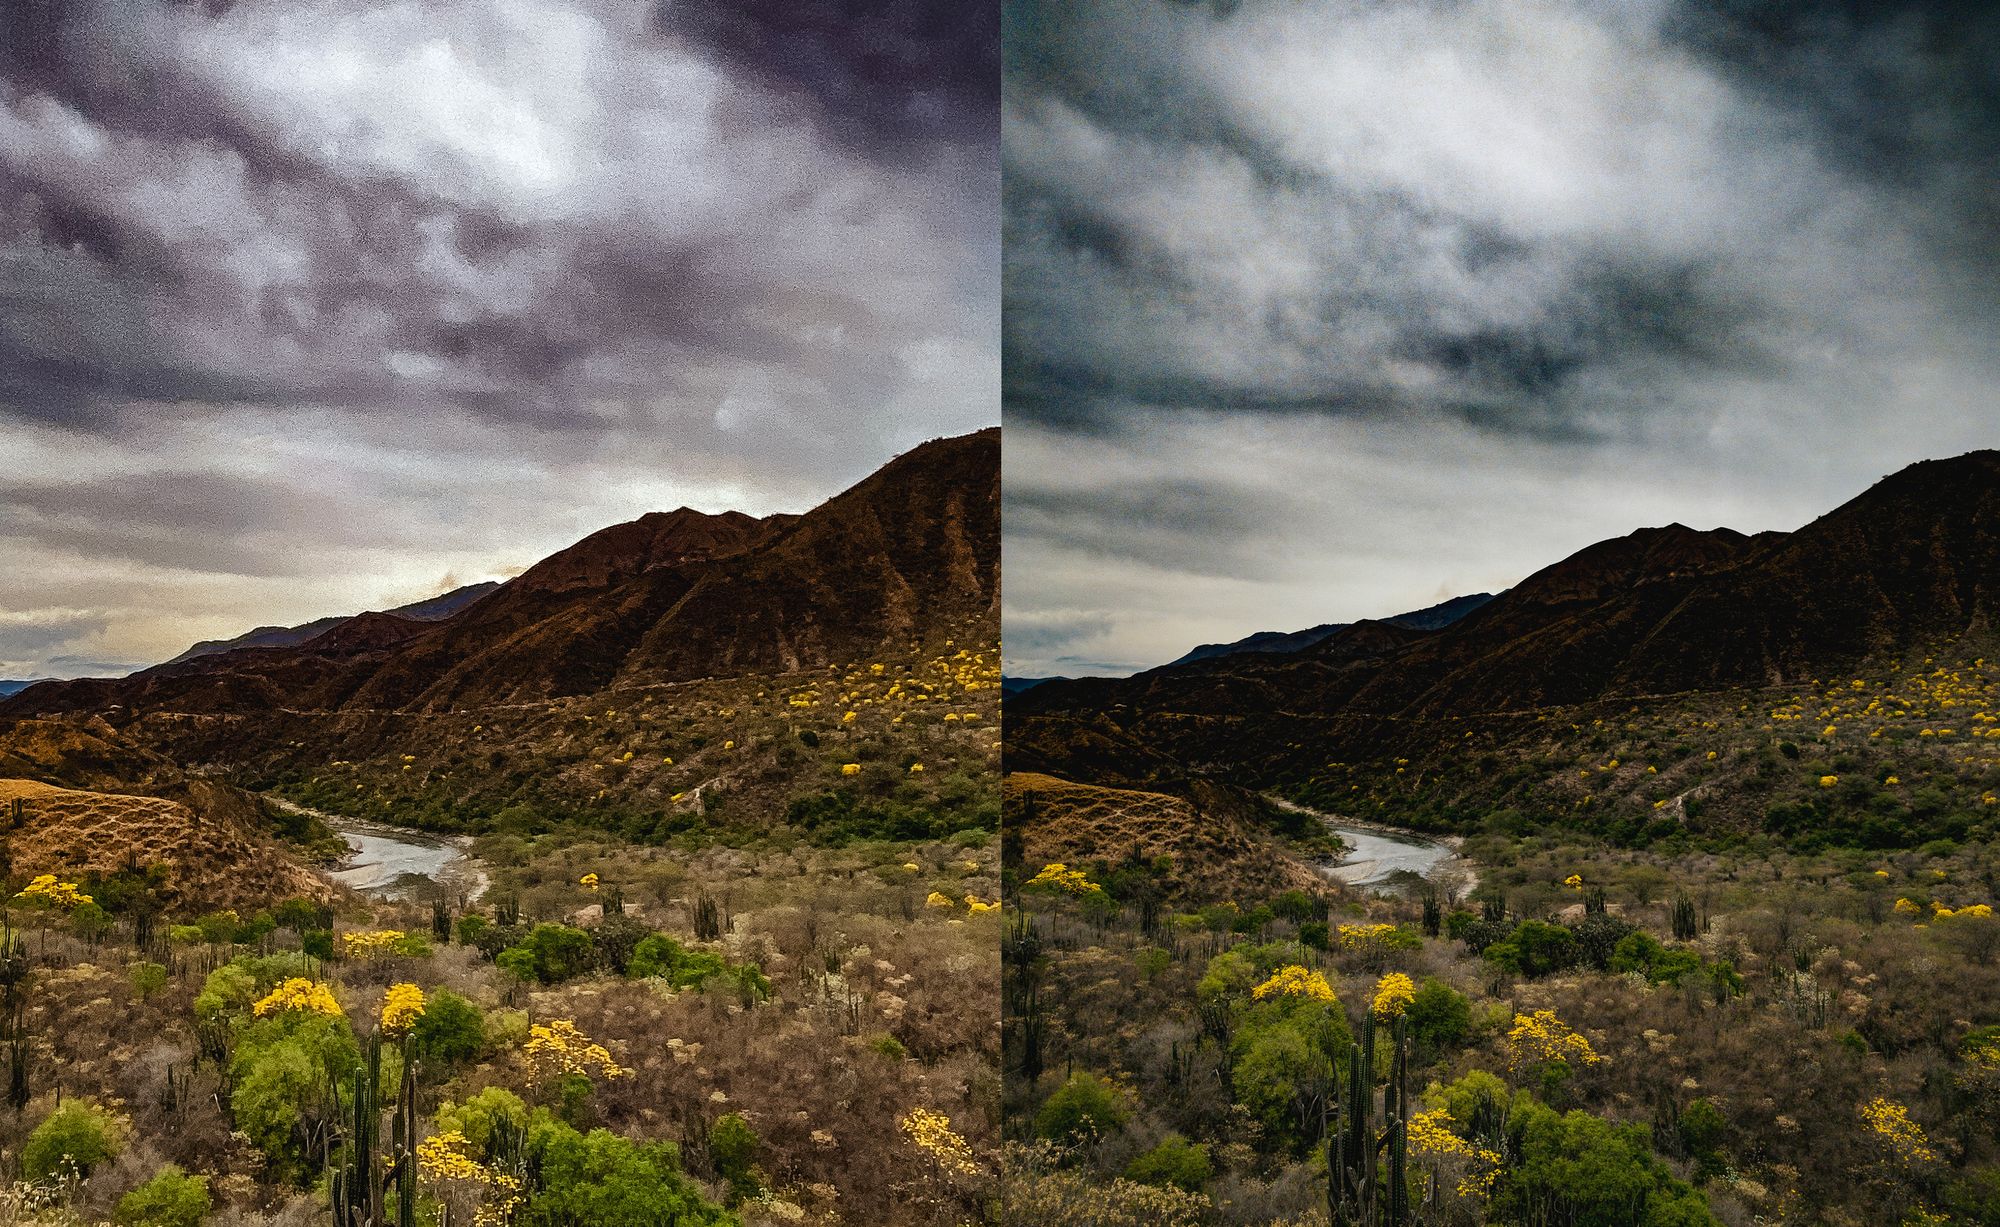
Apple added similar retouching to its capture process. The iPhone 11 now breaks down your image in various areas automatically and then applies different amounts of noise reduction to those areas. You probably can’t spot the noise reduction in this shot:
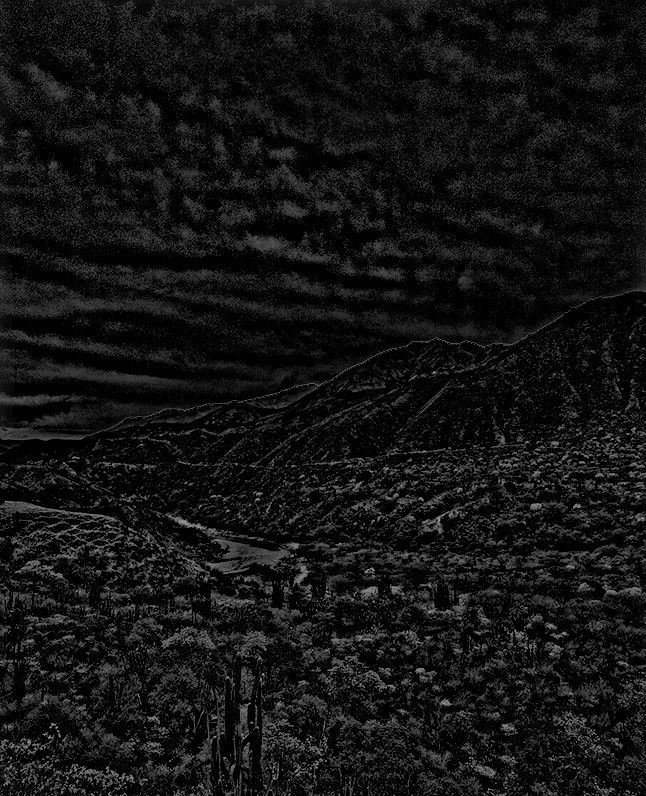
If we distort the contrast in an image, we can bring out the ‘watercolor artifacts’ in the clouds:

As you can see, the shot receives aggressive noise reduction in the sky. Since skies tend to be uniform surfaces of color, iOS figures it can apply its harshest, smoothest noise reduction to make the skies silky smooth, with nary a nodule of grain to be seen.
Other areas get different levels of noise reduction. Cacti and other features that the camera deemed worthy of detail get very little.
However, this technique isn’t perfect. Notice that in the original image, the shrubs that weren’t well defined lose a little detail. iOS doesn’t know,“This is a cactus, this is sky.” It seems to apply noise reduction based on the amount of initial detail.
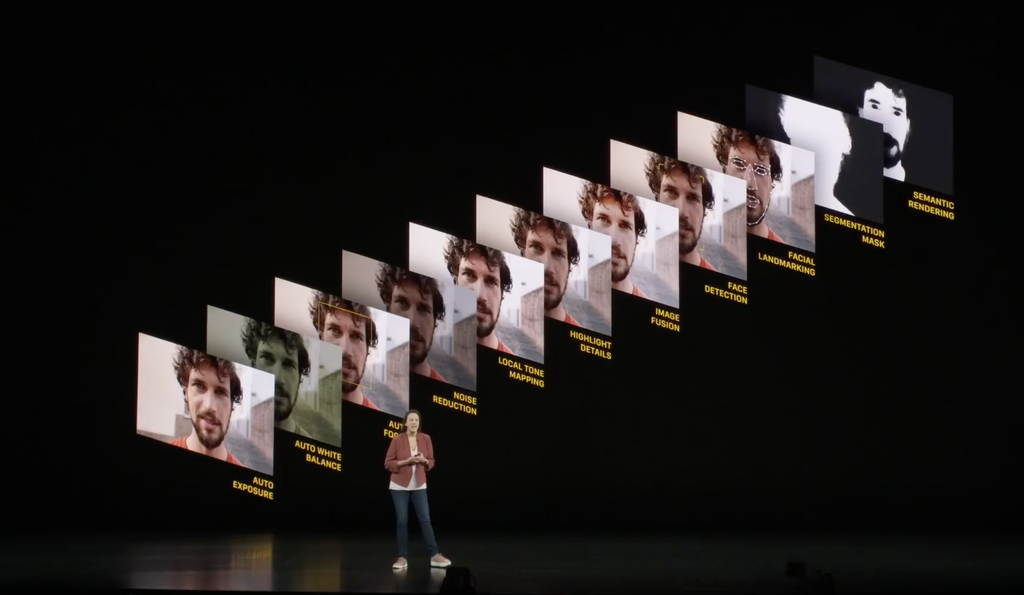
When iOS detects a face, it’s a very different story. It can specifically target detail in skin texture, hair, and clothing.


Apple refers to it as “Photo Segmentation.” They use machine learning to split the photo into tiny pieces and processes each individually. What’s so impressive is that all of that is done in an instant.
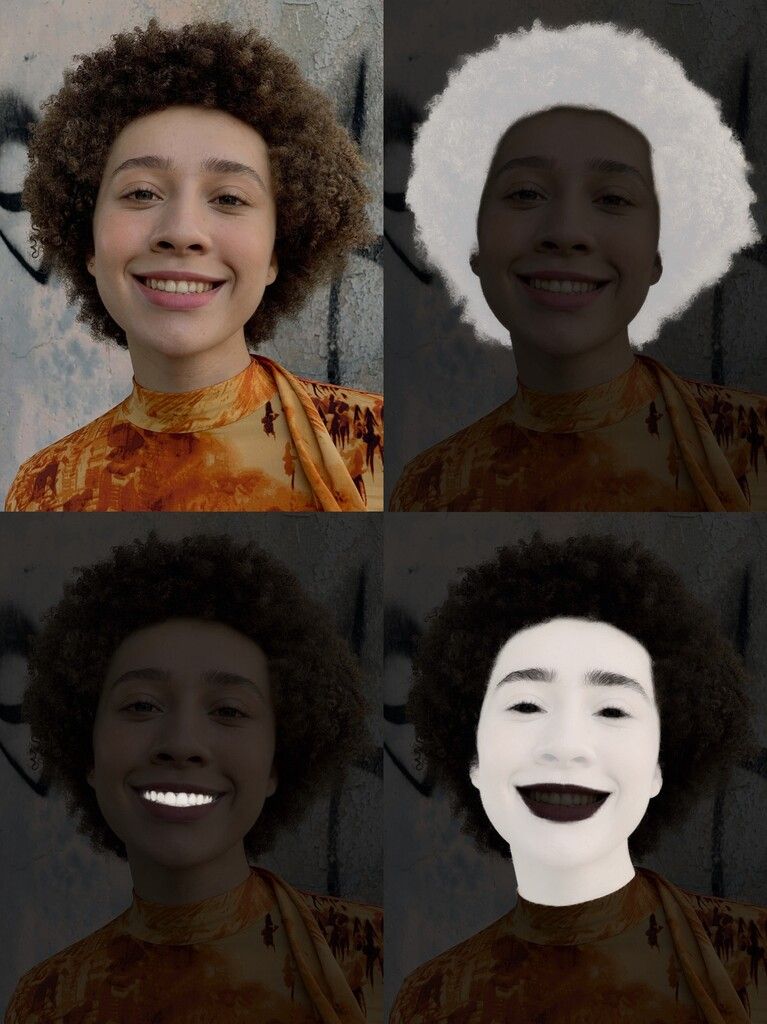
This targeted post-processing is what makes the iPhone 11 an entirely new camera. Techniques like (last year’s) Smart HDR much less discriminate.
This year’s change to the imaging pipeline selectively edits every shot you ever take to help retain particular areas or smooth over texture.
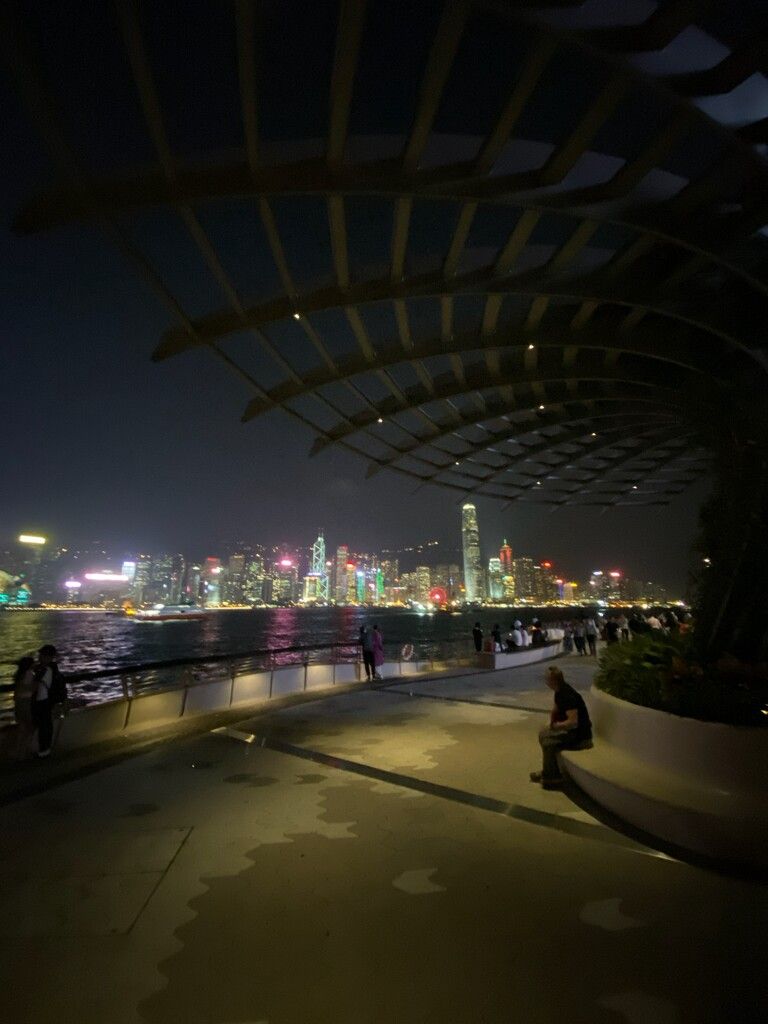
In the iPhone 11 Night Mode, you can also see detail vanish in some areas. Except that it really seems to only affect parts of the image that you don’t really care that much about. Night Mode has a remarkable if not uncanny ability to extract an image that is sometimes even sharper than the regular mode, with strong sharpening and detail retention occurring in areas that are selected by the camera during processing.
It’s ironic that there wasn’t much truth in last year’s ‘Beautygate’ controversy, because this year’s iPhones actually do airbrush particular parts of your image more aggressively than others. But since the camera is now smart enough to apply this selectively, in areas where you don’t even notice it, there are no controversies roiled the tech world this year. Images just looks sharper and smoother.
Better Noise Reduction
While it is somewhat difficult to make an objective comparison of the quality of noise reduction used on the iPhone 11 vs. the iPhone XS (it’s impossible to turn off semantic mapping to get ‘vanilla’ noise reduction), it does appear noise reduction on iPhone 11 is better at retaining details.
We could speculate the new noise reduction might uses machine learning to ‘fill in’ detail that could be lost to noise— many modern noise reduction technologies do. Regardless, this is a welcome improvement.
Post-Processing and the Ultra Wide Lens
We said it already: we’re very sad we cannot get RAW output from the ultra wide angle lens. Perhaps it will come in a software update. In this photo, you can see that detail is largely smoothed over:
The ultra wide lens is the slowest of the three rear lenses, forcing it to use a higher ISO. If you want to see this in real time, just use the nifty new zoom wheel on your iPhone camera app as soon as the sun starts going down. As you tick down to 0.9x and below, you’ll see texture in say, your carpet, just kind of… disappear.
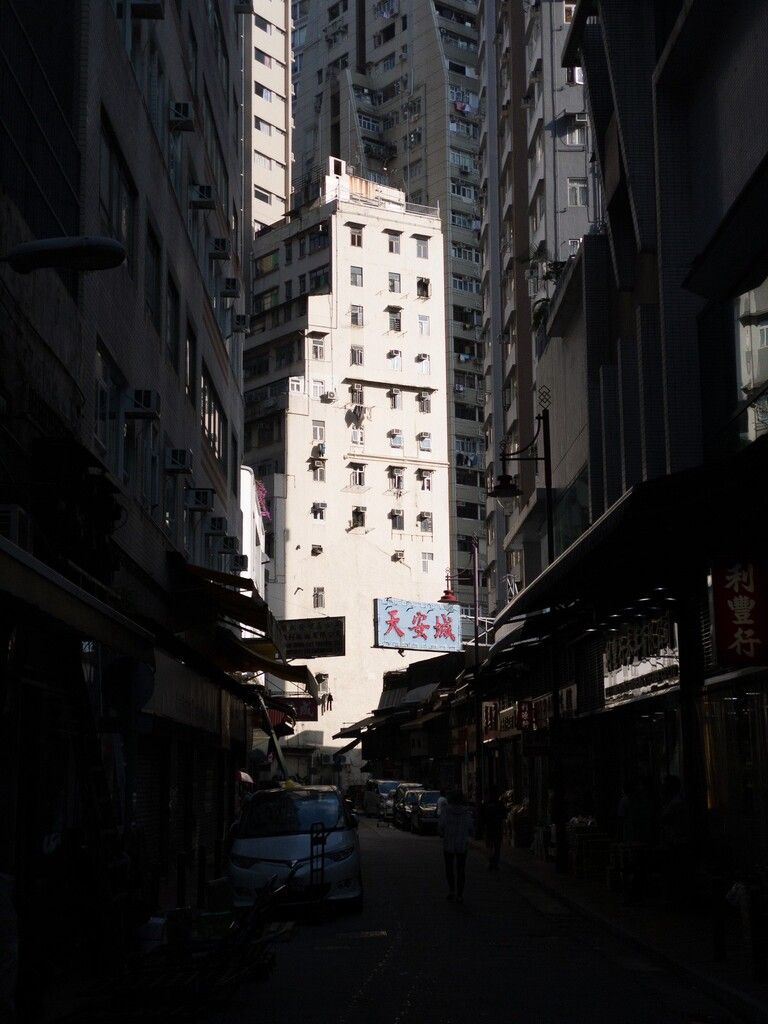
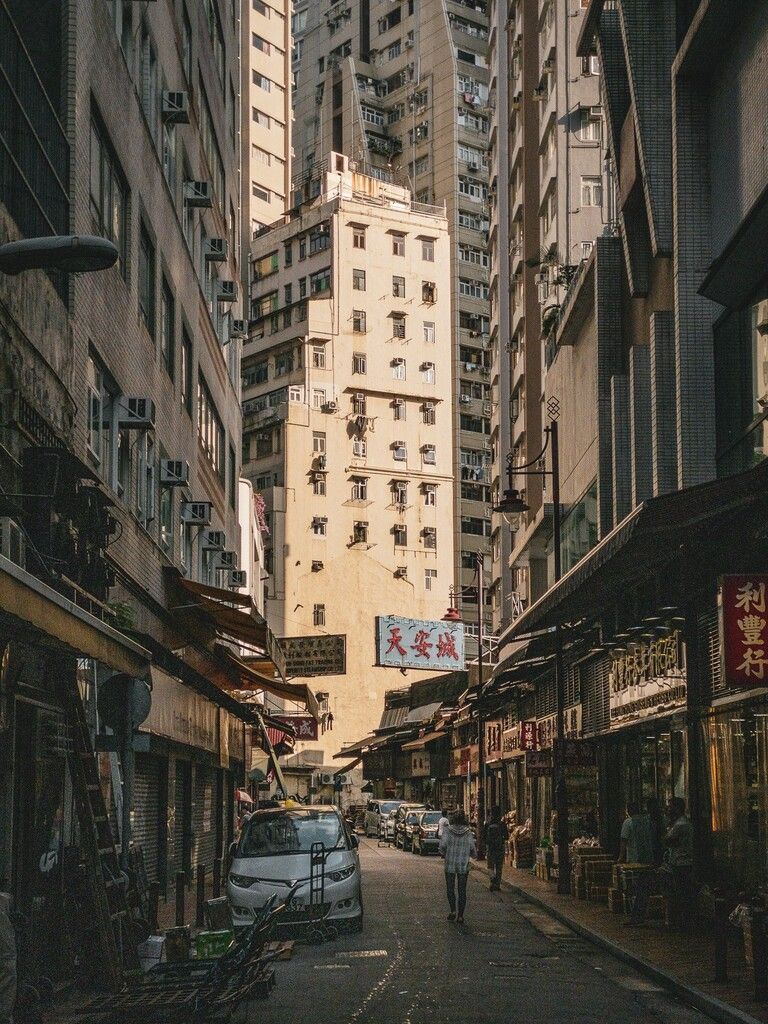
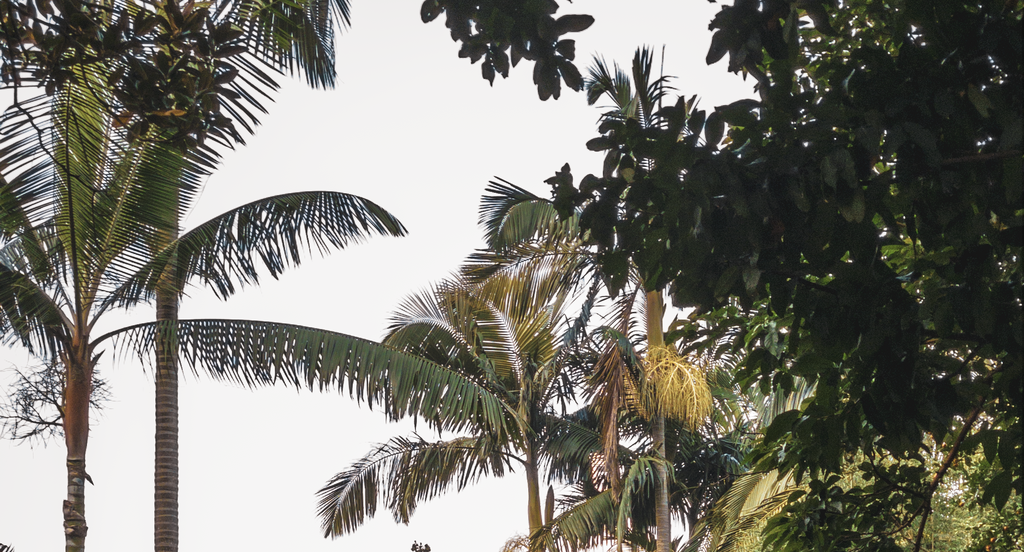
The ultra wide also faces a unique challenge: ‘chromatic aberration,’ or in plain English, purple fringes. The telephoto faces this to a lesser degree, and we can see it in its RAWs. Notice purple/pink-ish fringing around the leaves in this photo taken in the Hong Kong botanical gardens against direct sunlight:
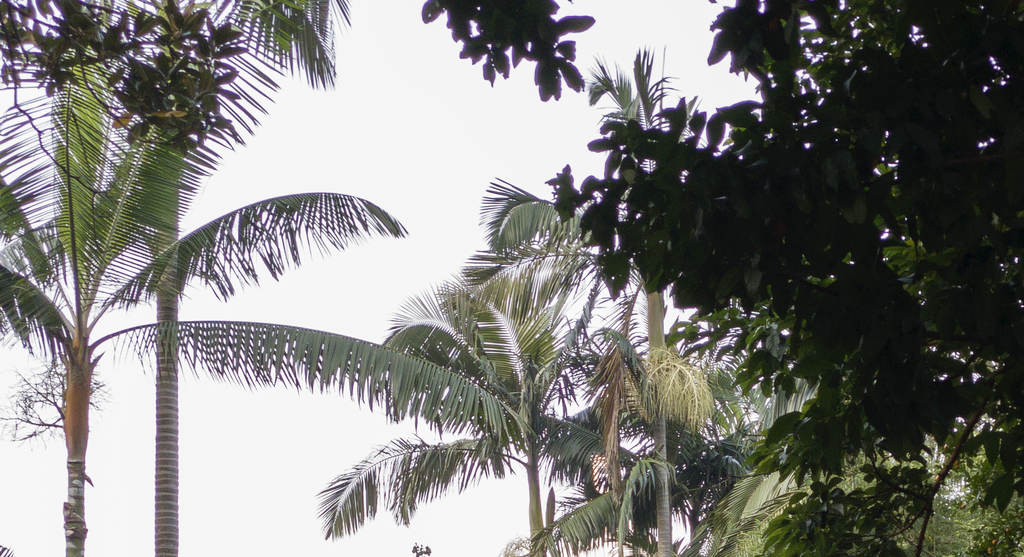
This is something photographers that shoot with ‘fast lenses’ (large aperture; the range between f/2.0 and f/0.95 — a smaller number being a larger aperture) are used to: the more light a lens can let in, the more it is likely to suffer from the dreaded fringing. Fortunately apps like Lightroom can remove fringing just fine; now Apple’s automatic-post processing saves shots from this somewhat unflattering chromatic aberration.
If we do ever get RAW output from the ultra-wide angle lens, I’d love to see it without any correction: from fish-eye distortion to fringing, I want to see the (ugly) truth.
A Compelling DSLR Competitor?
This year’s changes are huge. Thanks to hardware improvements, semantic adjustments on every frame, Smart HDR improvements and tweaks to noise reduction, the iPhone 11 and 11 Pro are real contenders for the smartphone camera throne.
In the past, iPhones made great photos for sharing on social media, but blown up on a big screen, the shots didn’t hold up. It’s why I frequently still pack a ‘big’ camera with me on trips.
With these huge improvements in processing, the iPhone 11 is the first iPhone that legitimately challenges a dedicated camera.
Thanks to some hefty software processing, the sharpness and detail is now on the level of being usable for prints and higher-resolution screen viewing.
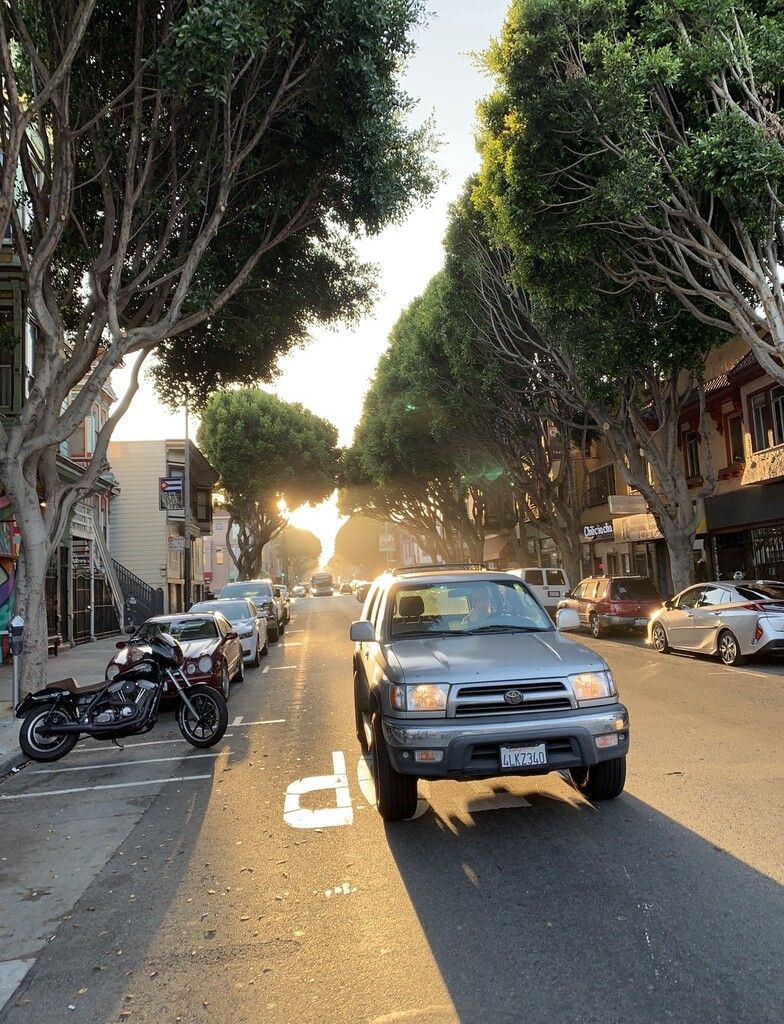
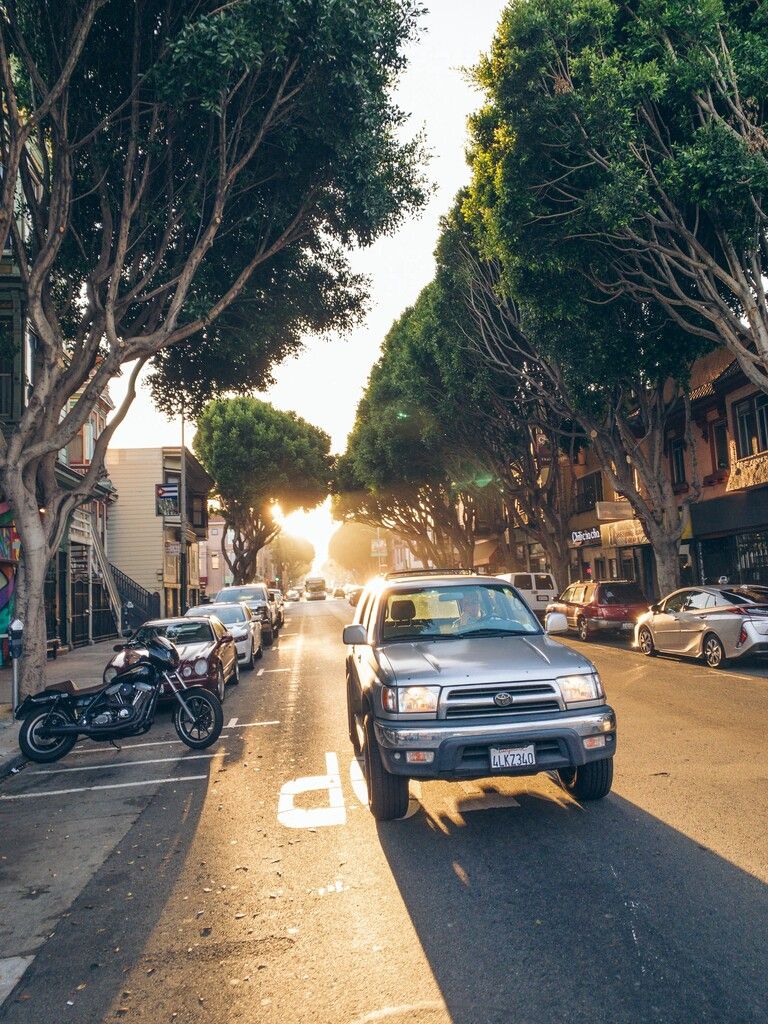
One of the shots below was taken with a $4000 Sony A7R4 — a brand new flagship full-frame camera that came out in September — paired with a $1500 G-Master lens with a focal length close to the iPhone’s wide (24mm vs. iPhone’s 26mm). The other shot was taken on an iPhone 11 Pro with its 52mm telephoto lens. ‡
You can probably figure out which is which, but the question is not when we achieve parity, but when we achieve ‘good enough’. Camera makers should be concerned.
‡ obviously, the Sony’s actual image was much larger: but it is also 61 megapixels compared to the iPhone’s 12 megapixels. The iPhone image only had to be scaled down slightly to match the 100% crop of the Sony shot.
Does This Make RAW Obsolete?
No.
With all this detail, it would seem that there’s no real purpose to shooting RAW anymore. After all, if we can have all the detail and no noise, what’s the point?
You’ll find there are still reasons to shoot RAW on iPhone if you want to get more out of that tiny, but powerful array of cameras.
There’s still more detail in RAW
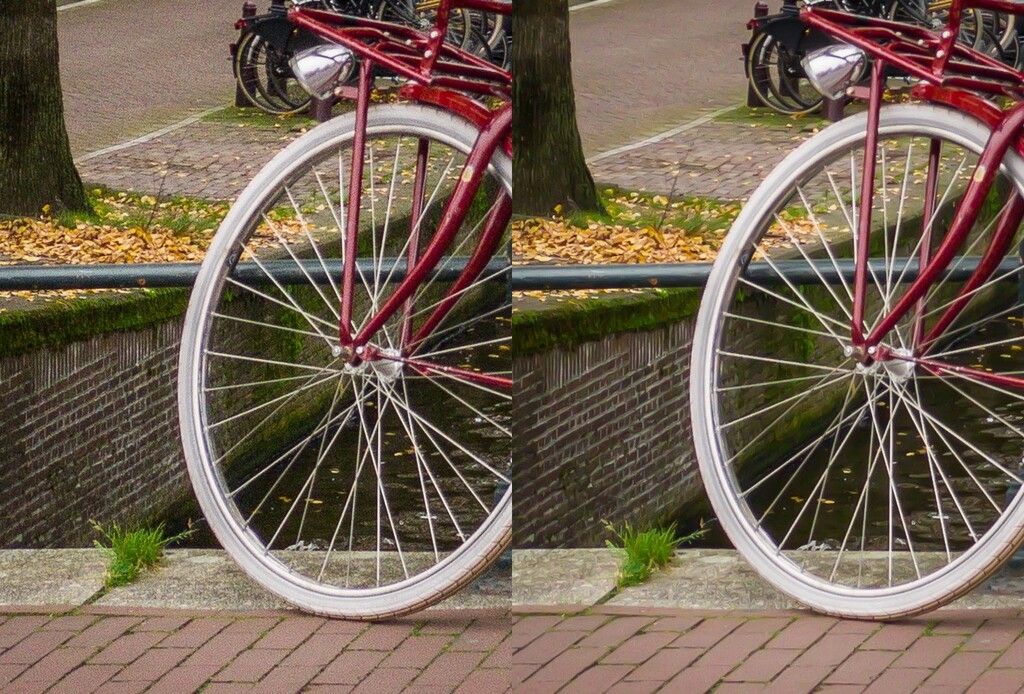
This might astound you, but yes: there’s still more detail in RAW photos. This is particularly noticeable in fine detail that semantic mapping and noise reduction doesn’t quite respect as being meaningful and when Smart HDR has to do a lot of merging:
Yep, detail is still better in RAW. Just look at this 100% crop. The sweater, the hair, grass, and even the trees in the background:
Yes, there’s some grain. The little bit of grain you get in most shooting conditions really only adds to the character of the shot, in my opinion.
You can, of course, always use your favorite editing app to apply noise reduction later. That’s something you can do, rather that being stuck with an image that has all the noise — and with it, underlying detail and texture— removed permanently and irreversibly.
Flexibility in Editing
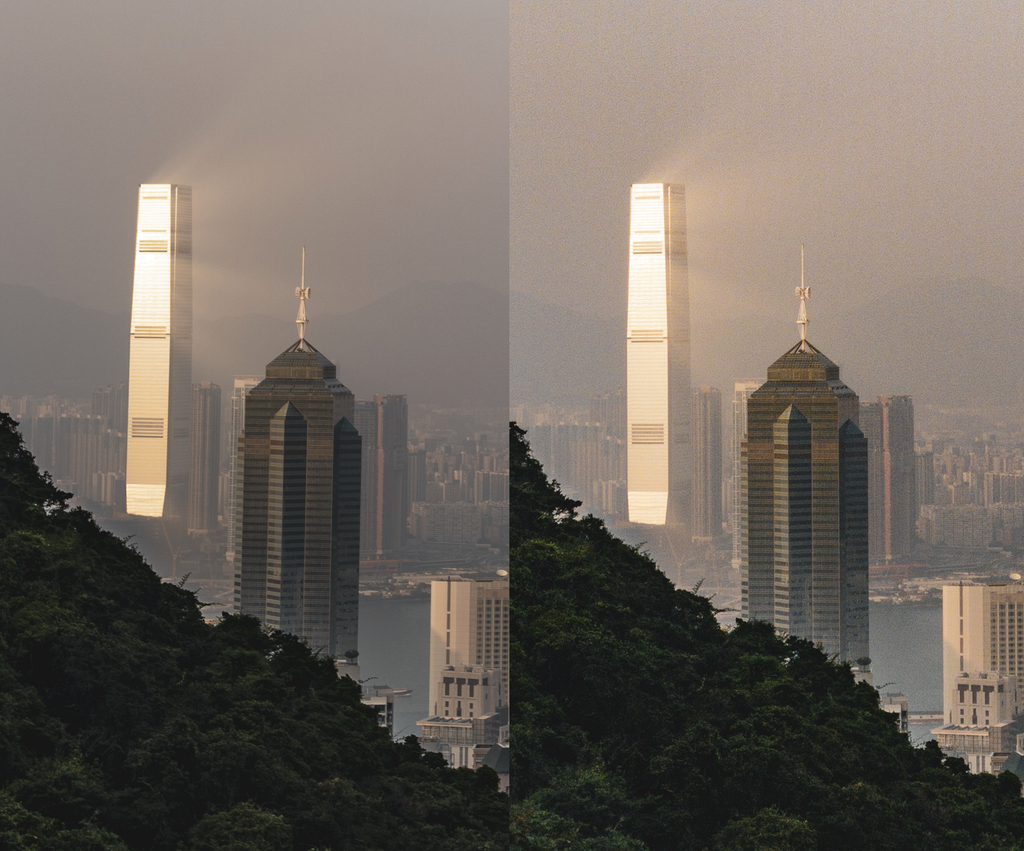
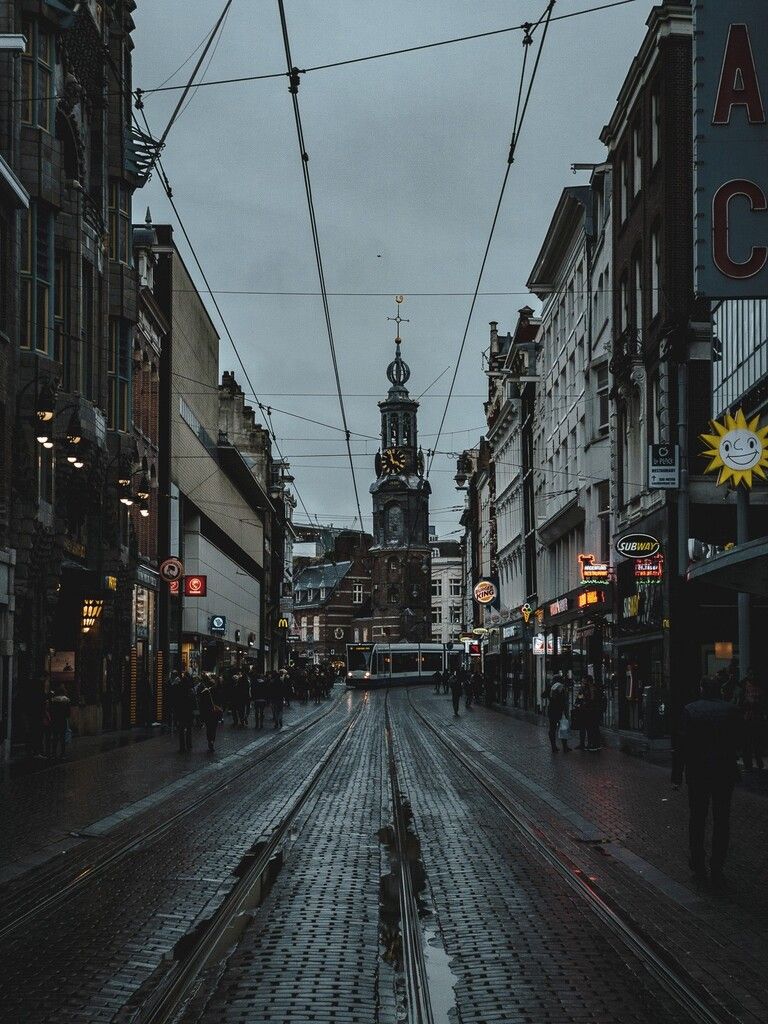
When a photo is saved as an JPEG or HEIC, it throws away a lot of data useful in editing. Pushing around the highlight and shadows sometimes reveal strange fall-off areas and edges around objects because of exposure merging:
At times, skies appear strange when recovering highlights, whereas the extra data in the RAW file will prevent banding and create a graceful roll-off (a fancy word for gradients that look natural):
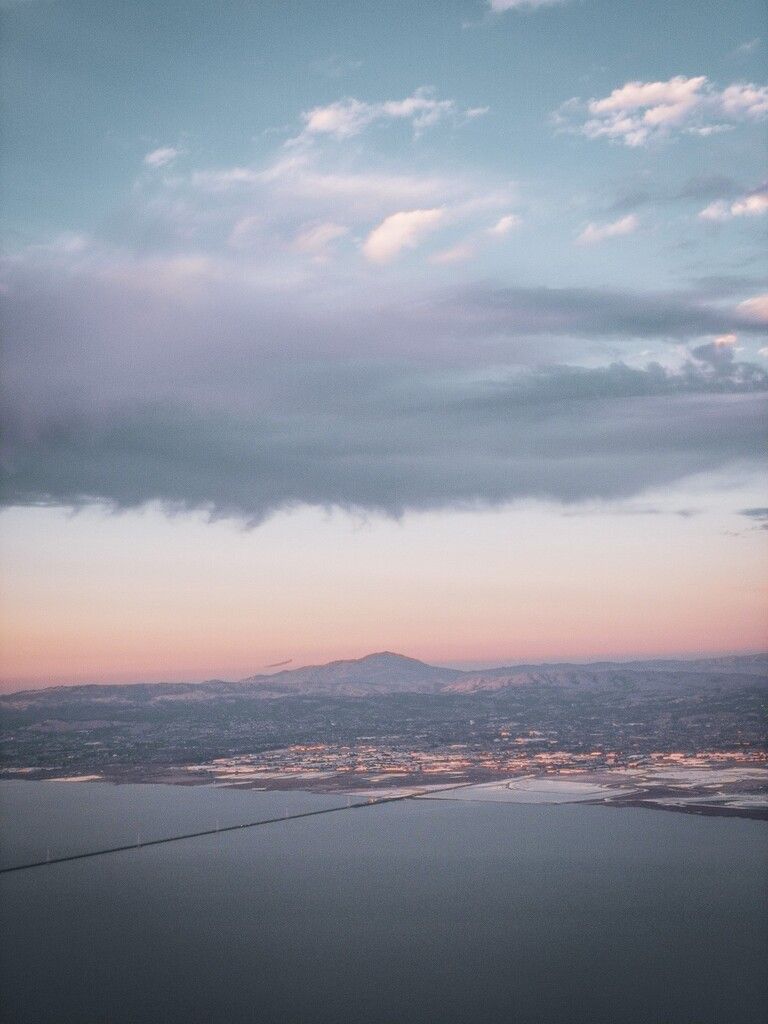
Current iPhone 11 RAW files bias towards a rather bright, flat look. Despite this seemingly overexposed look, aggressively pushing down the exposure when editing reveals no detail in the highlights was lost:


For the pros, here’s what the levels looked like initially:
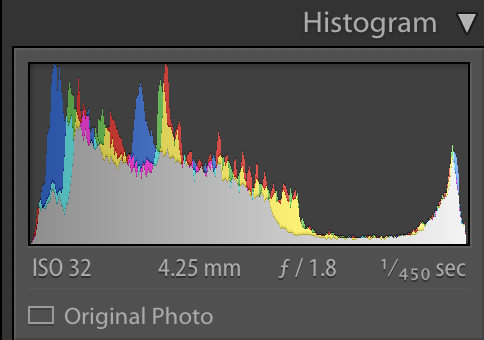
No HDR necessary. Beautiful, smoothly rolled off highlights.
A similarly exposed JPG or HEIC might get a similar look with Smart HDR, but when editing allow far less flexibility.
Editing white balance is a superpower
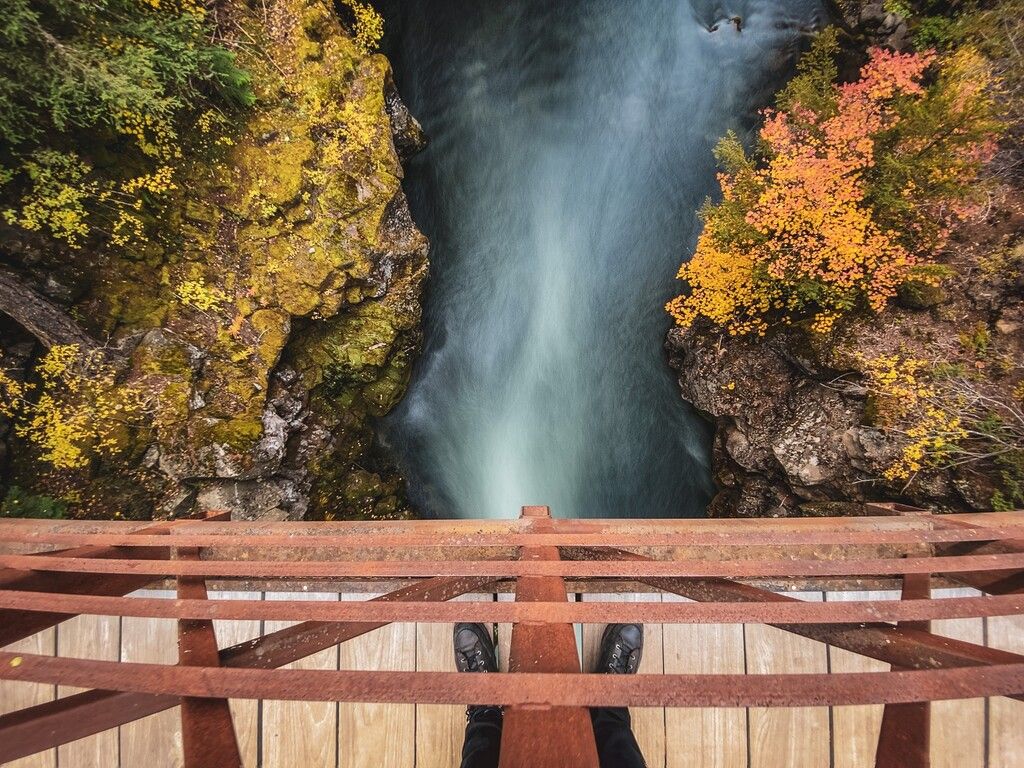
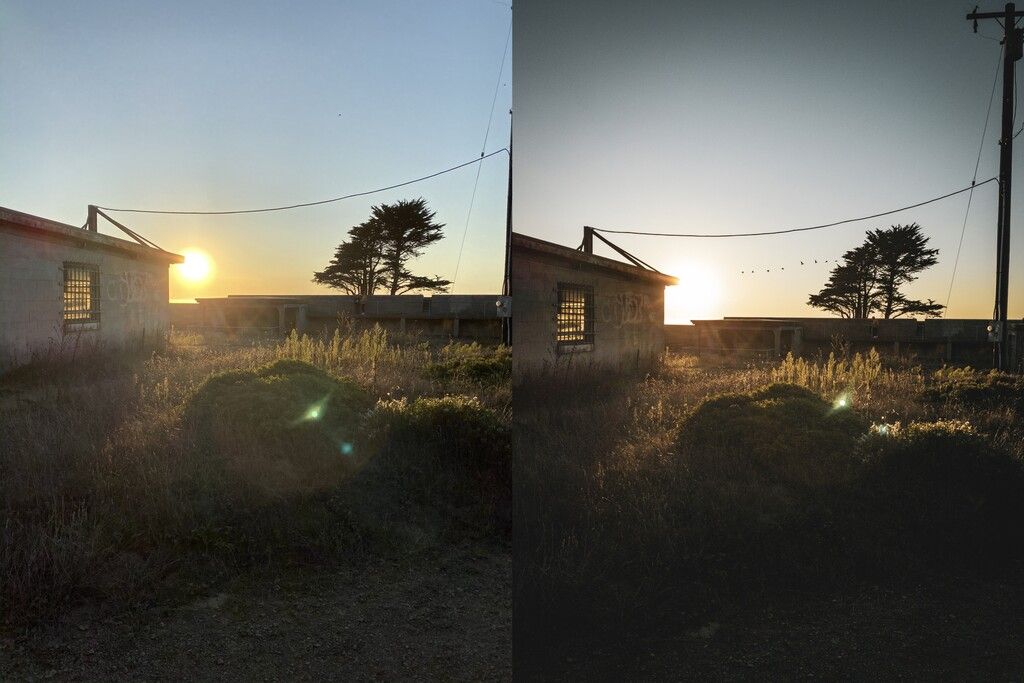
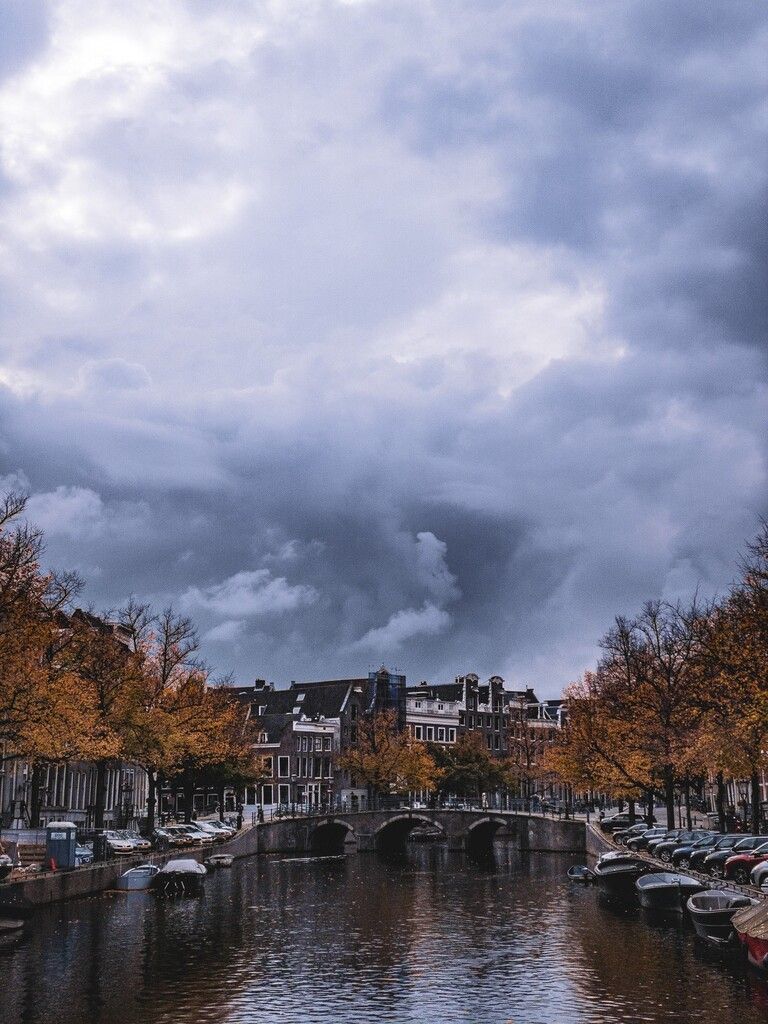
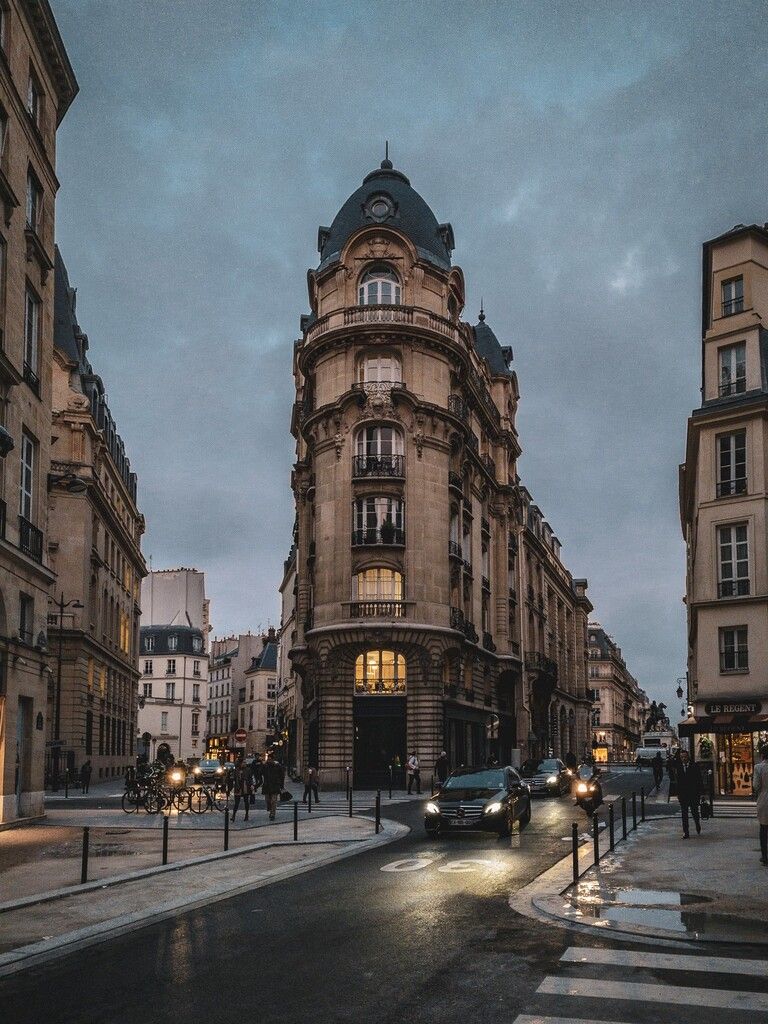
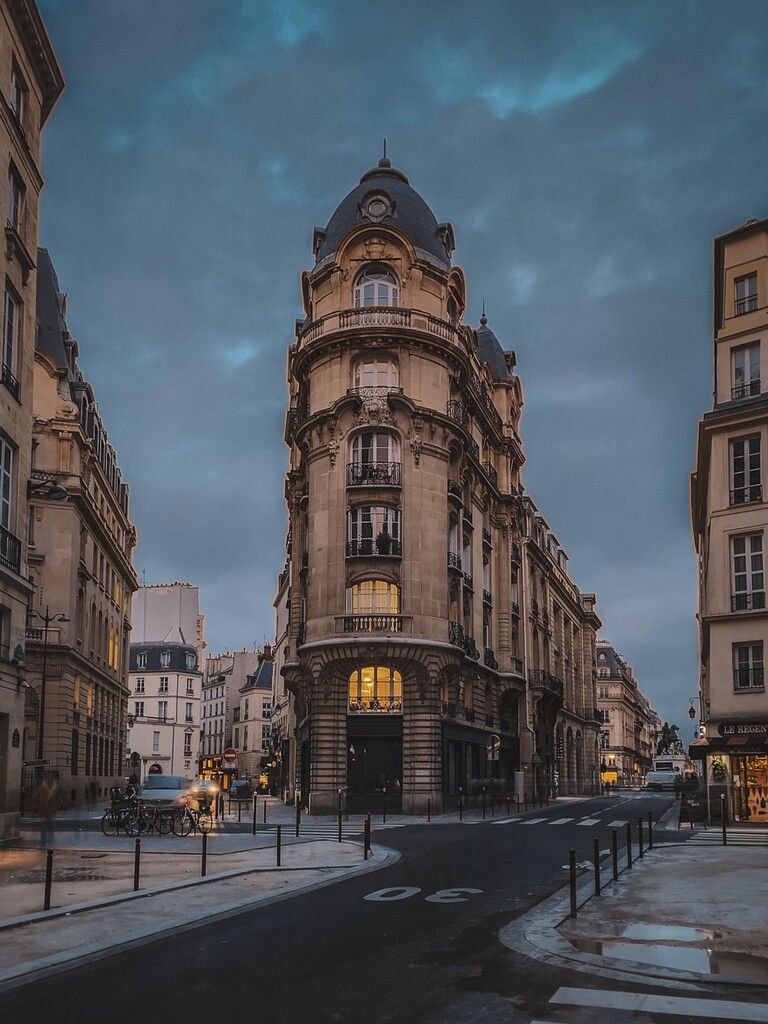
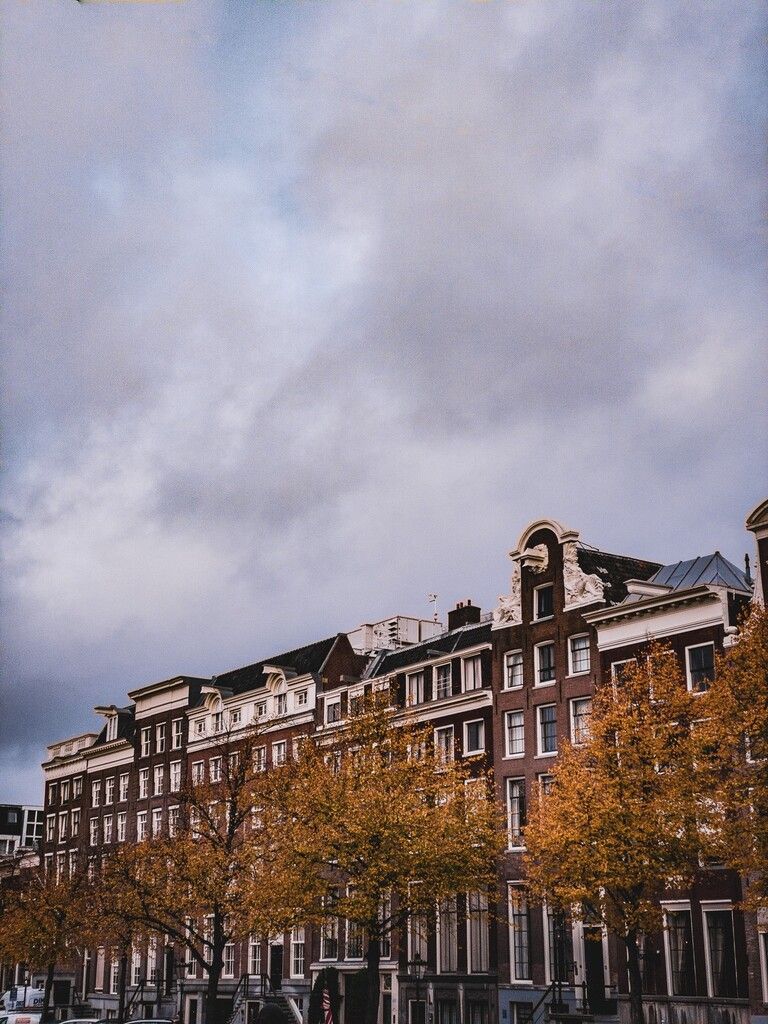
Cameras face a variety of lighting conditions, and have to figure out what’s white in a shot. You might look at a beautiful snowy scene outside on Christmas Day — hooray a white Christmas! — and snap a photo only to find it blue, or yellow. The sky might cast a blue light on the white snow, or at sunset cast an orange glow, confusing your camera.
If you take a photo in the Camera app, that white balance is committed to your shot and can’t be changed. You can change all the colors in your image by adjusting the tint or hue, but you can’t simply set the white balance after the fact. RAW files let you do this, which gives you the ability to make dramatic shots of wildly varying fall moods:
Or get completely creative with color and color balance and create shots that fit right in on a subreddit like /r/outrun:
As cameras increasingly ‘edit’ our shots for us as we capture them, there’s also something to be said for denying the aesthetic dictated upon us by camera processing and taking matters into your own hands. Photography is art, after all!
There’s no need to choose
If that all sounds a bit overwhelming, we found the best way to enjoy both worlds — the processed magic and the raw power of RAW — was to simply give you both. Apps like Halide are able to take a RAW and processed JPG simultaneously (Halide does this by default) to let you choose later on whatever works best.
That is, if you’re not shooting with the ultra-wide lens.
Halide 1.15: Smart, Smarter, Smartest
Choice is good. In iOS 12, our HEIC/JPG shots in Halide got the majority of software magic on the iPhone XS, XR and 11/11 Pro, but not quite all of it. For instance, we noticed slightly reduced dynamic range in our Smart HDR shots compared to the stock camera app output.
With the introduction of new APIs from Apple in iOS 13, we have released a new update that gives you one more choice.
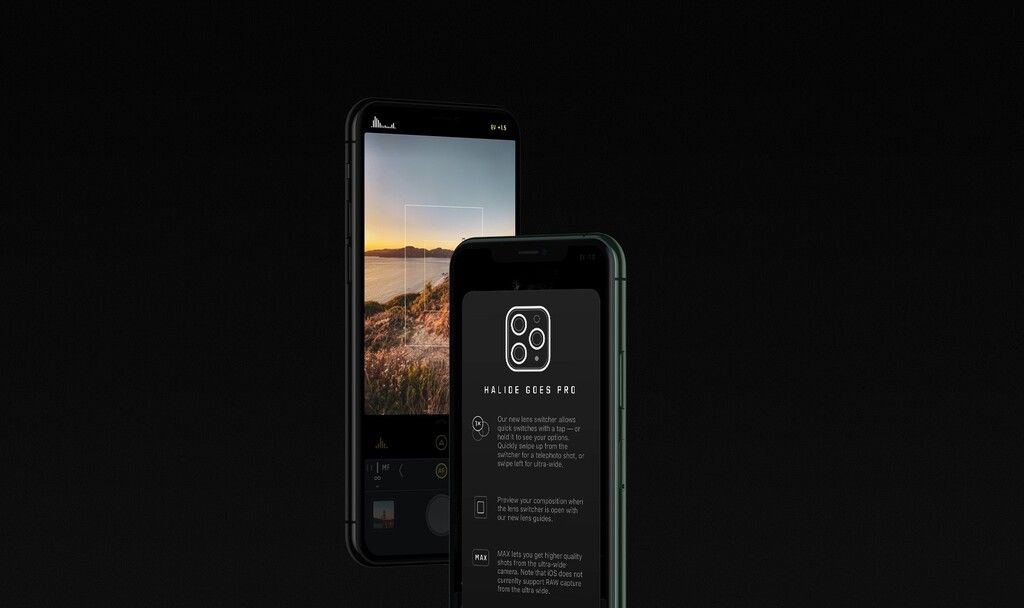
Halide 1.15 adds a new option: “Enable Smartest Processing”. This allows the camera to take as much time as it needs to get a shot with the exact same process as the built-in camera app, letting you get all the dynamic range or even Deep Fusion in your shots.
The only catch is that you have to disable RAW capture, as it is not possible to take a shot with all the smart processing and a RAW at the same time. (Unfortunately, it’s a limitation outside of our control.)
This new setting is available on devices running iOS 13 and makes the biggest difference on iPhone XS, XR and the 11 and 11 Pro. Deep Fusion is only available on iPhone 11 and 11 Pro, starting with iOS 13.2.
We’re really excited to let you play with both RAW and fully-processed captures in one app, and look forward to hearing which one you prefer.

Speaking of choice: For quick switching between the two, we suggest simply moving around the RAW toggle in the Quick Bar. We’ve made a quick tutorial on how you can do that here.
Happy shooting!
Check back with us soon for Part 2 of our look at the iPhone 11 camera process, featuring a breakdown of Night Mode, Deep Fusion and several other magic tricks. In the mean time, we’re always happy to get questions to answer on Twitter!